Preparing the baby carrier
Leg strap adjustment with buttons
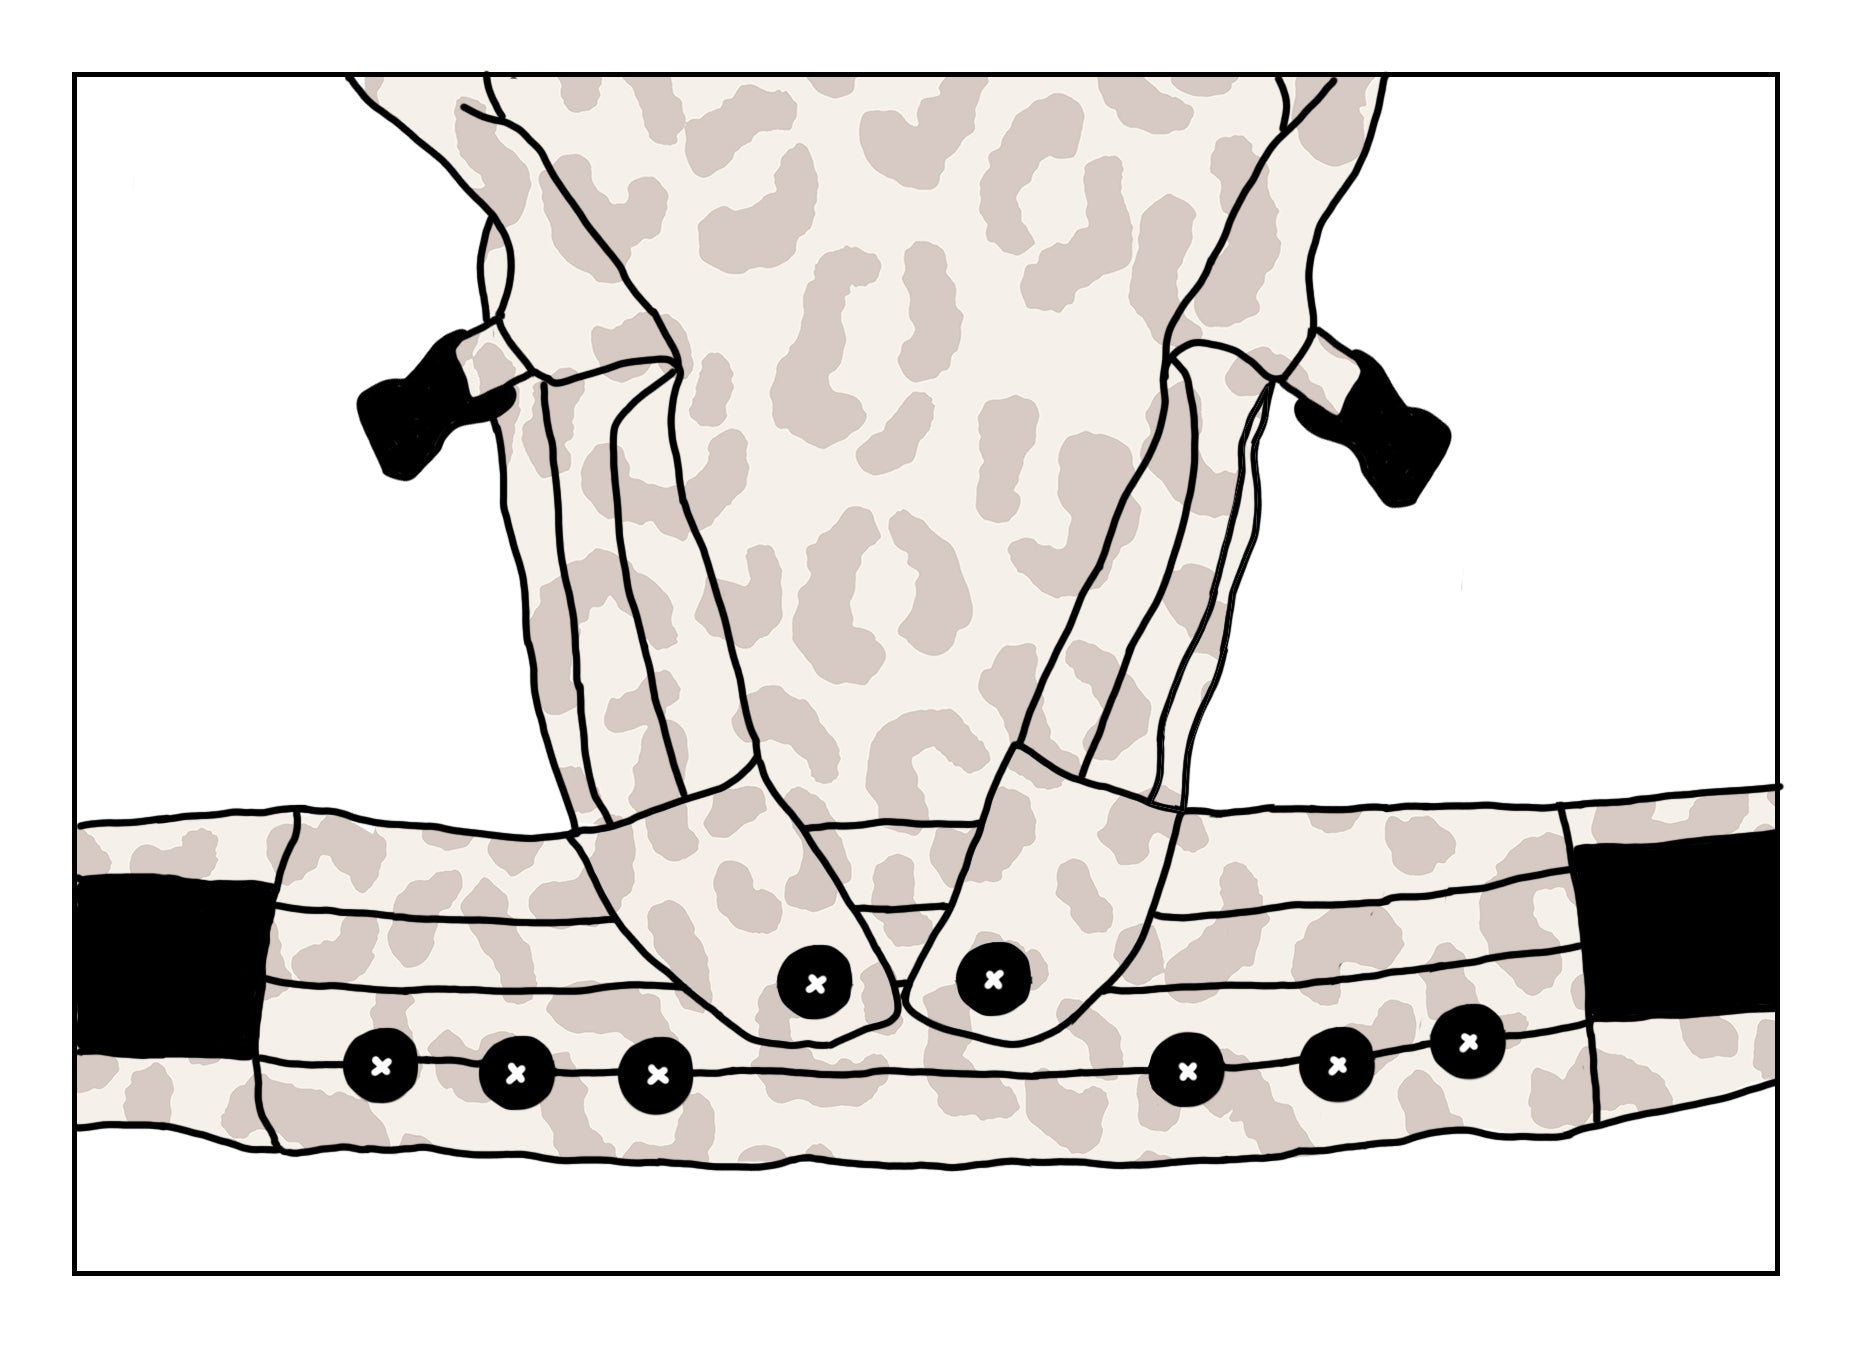
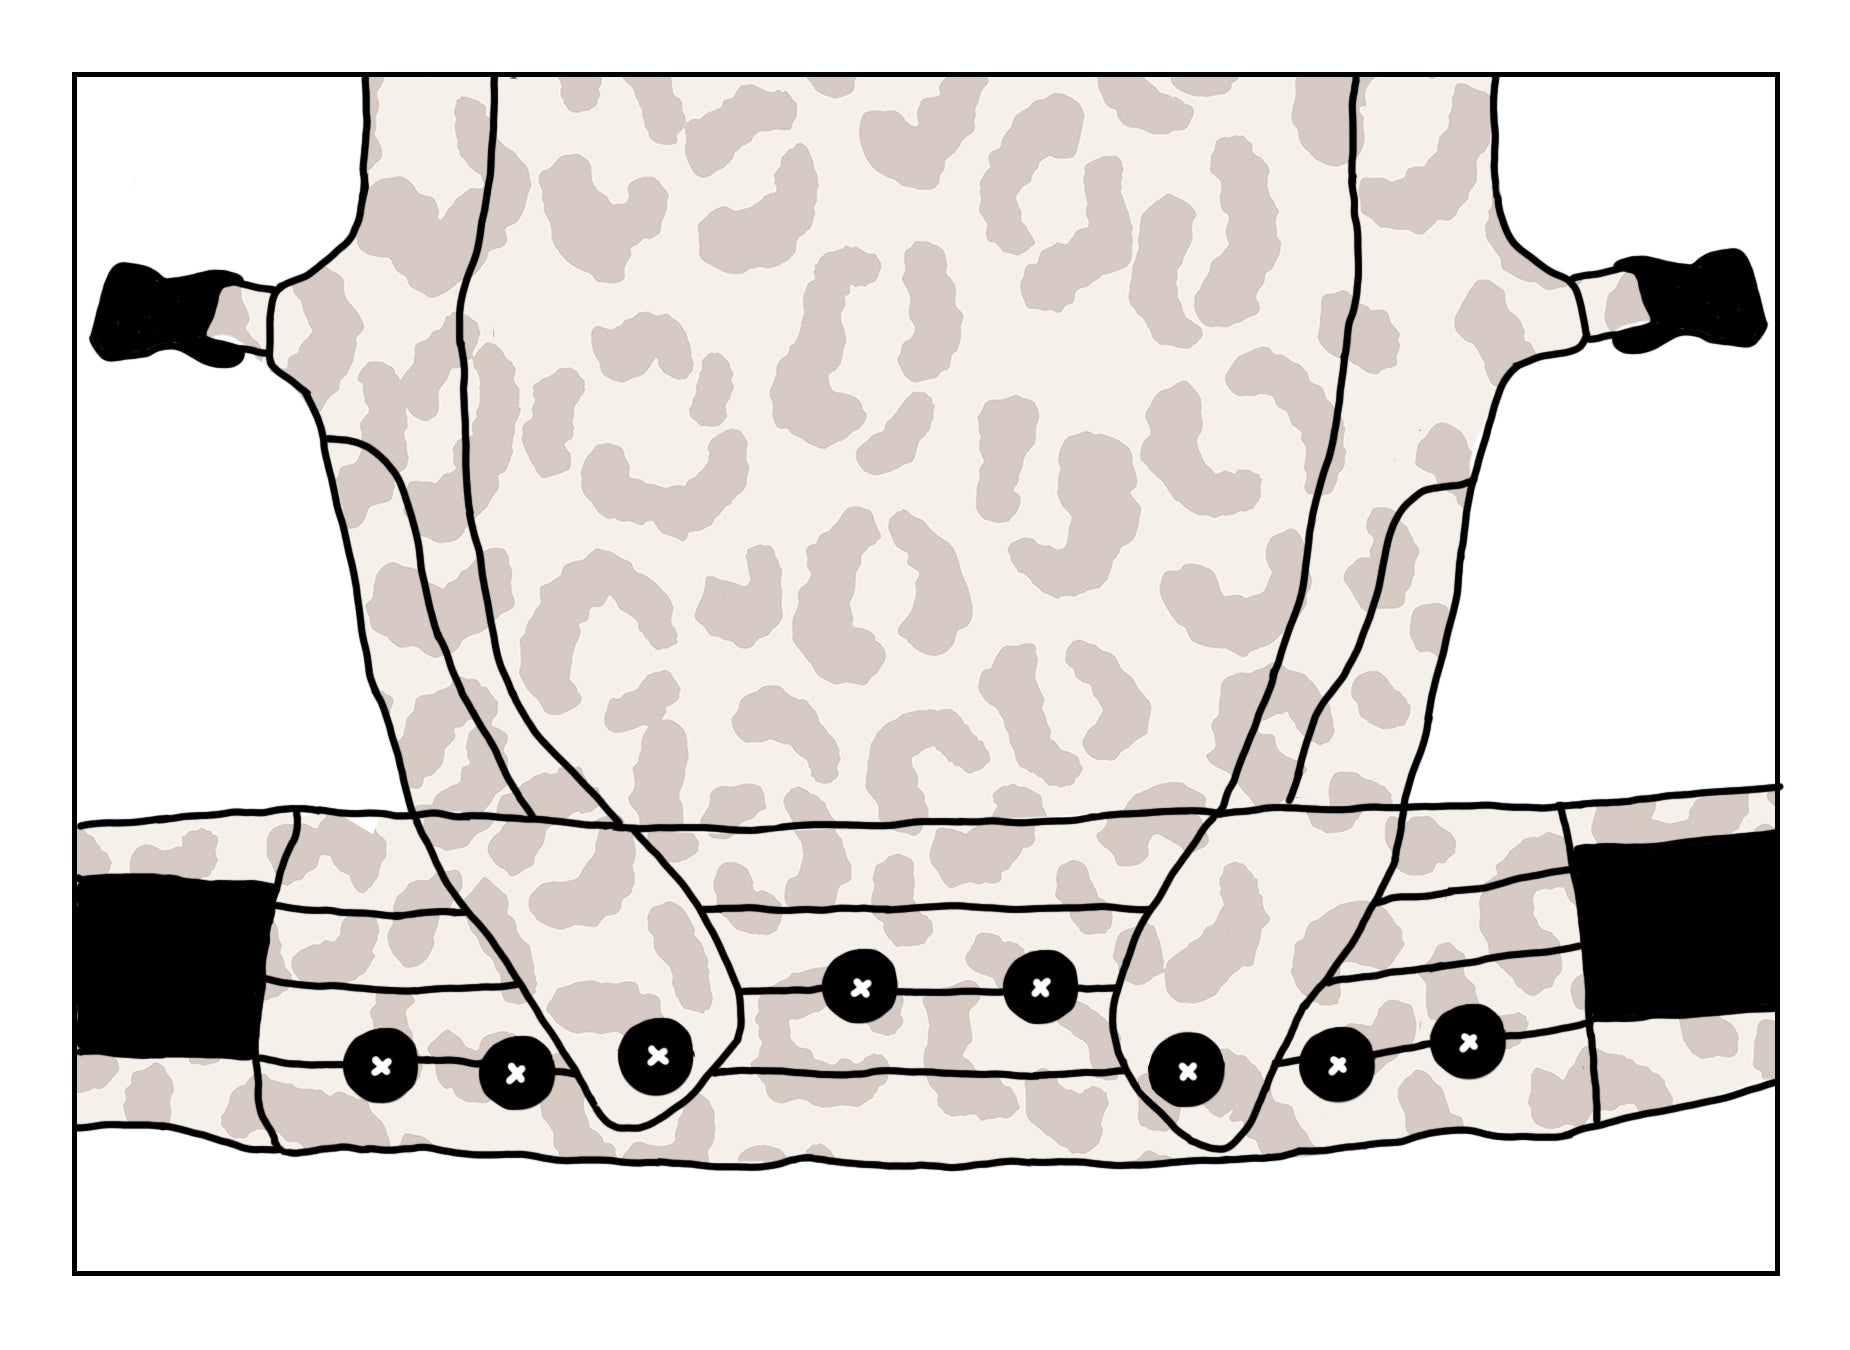
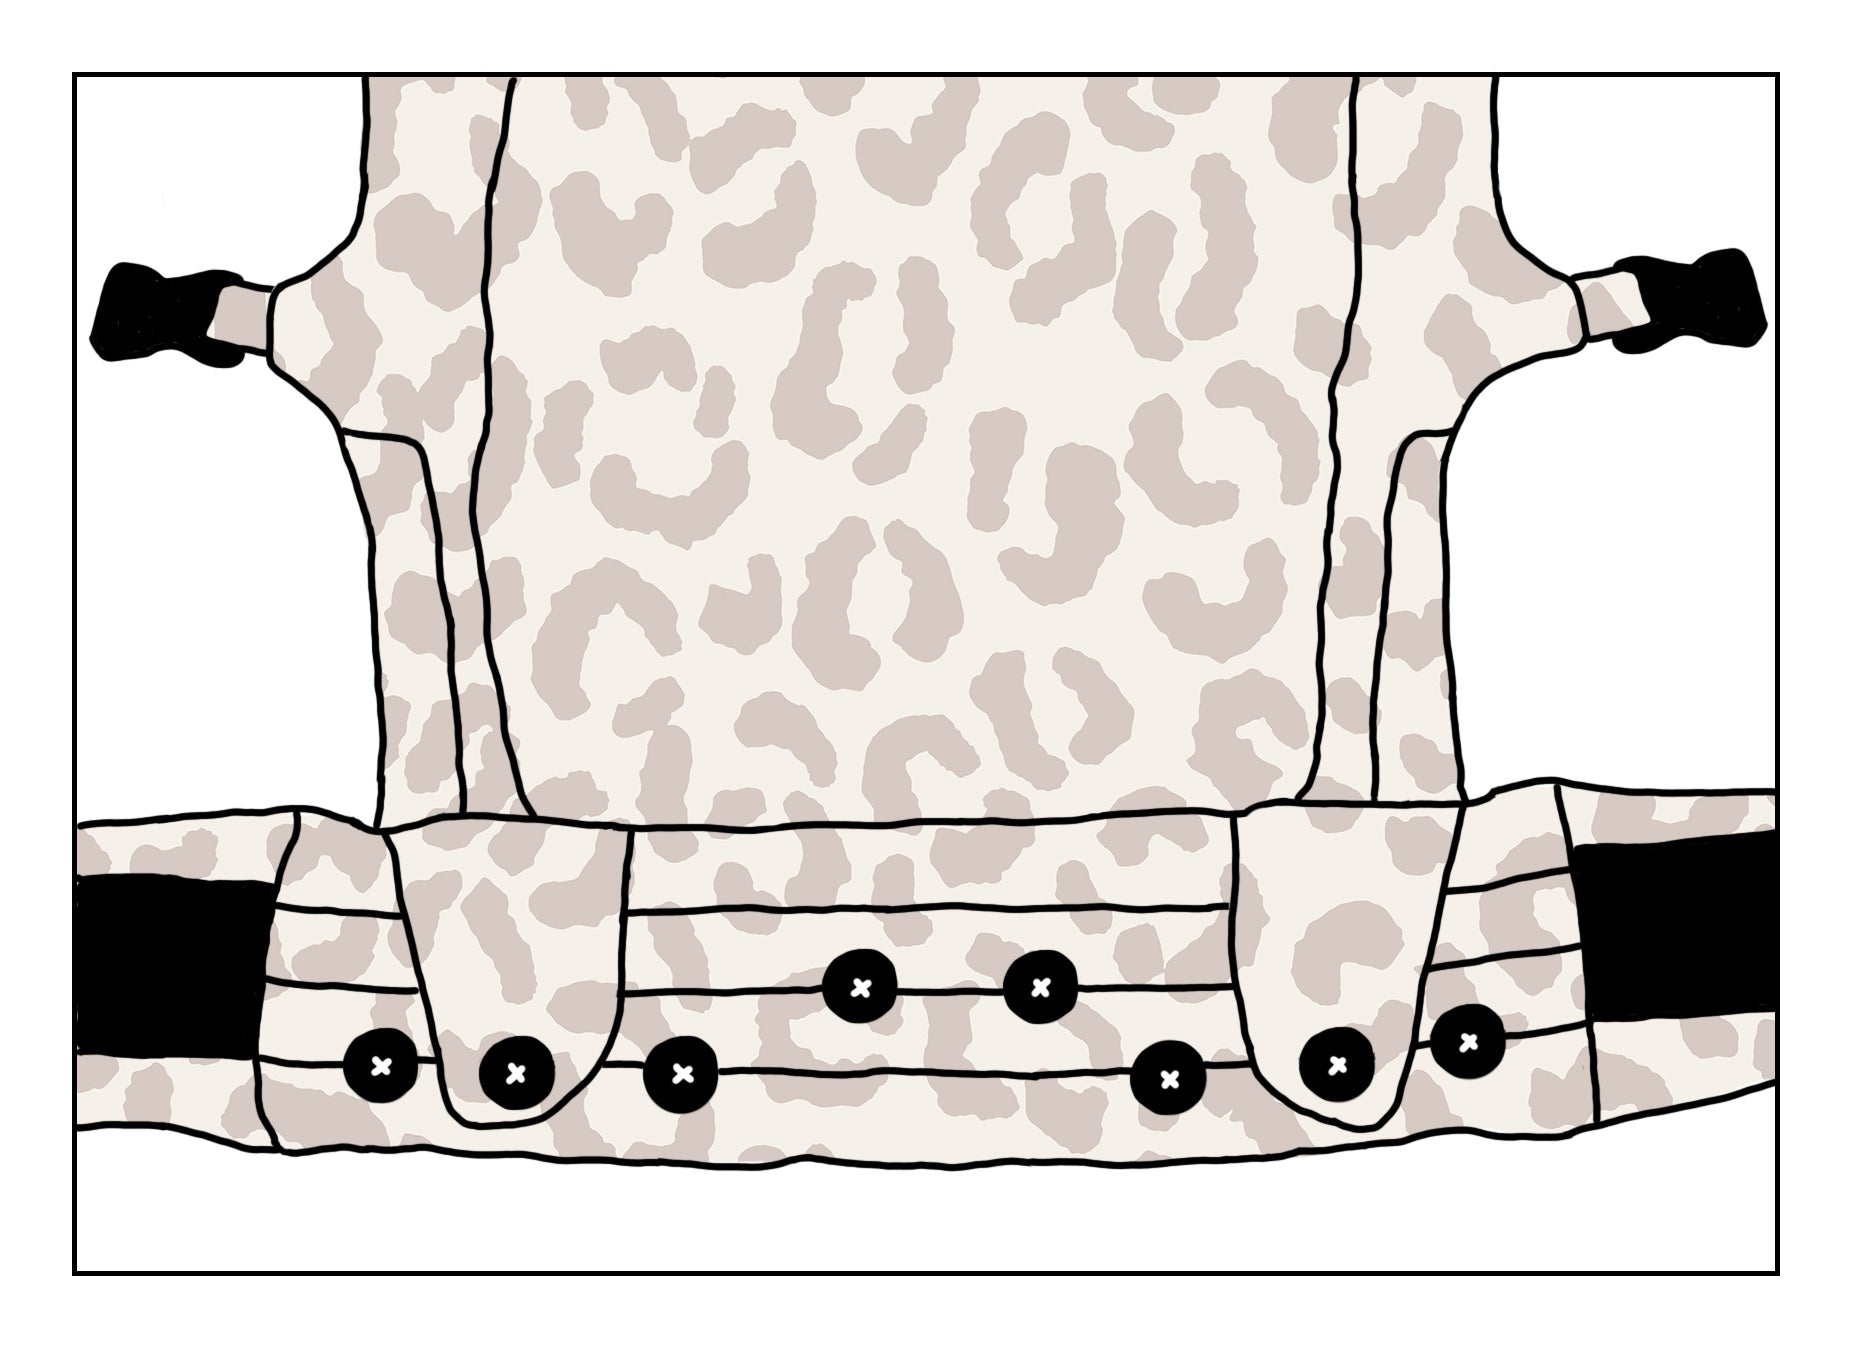
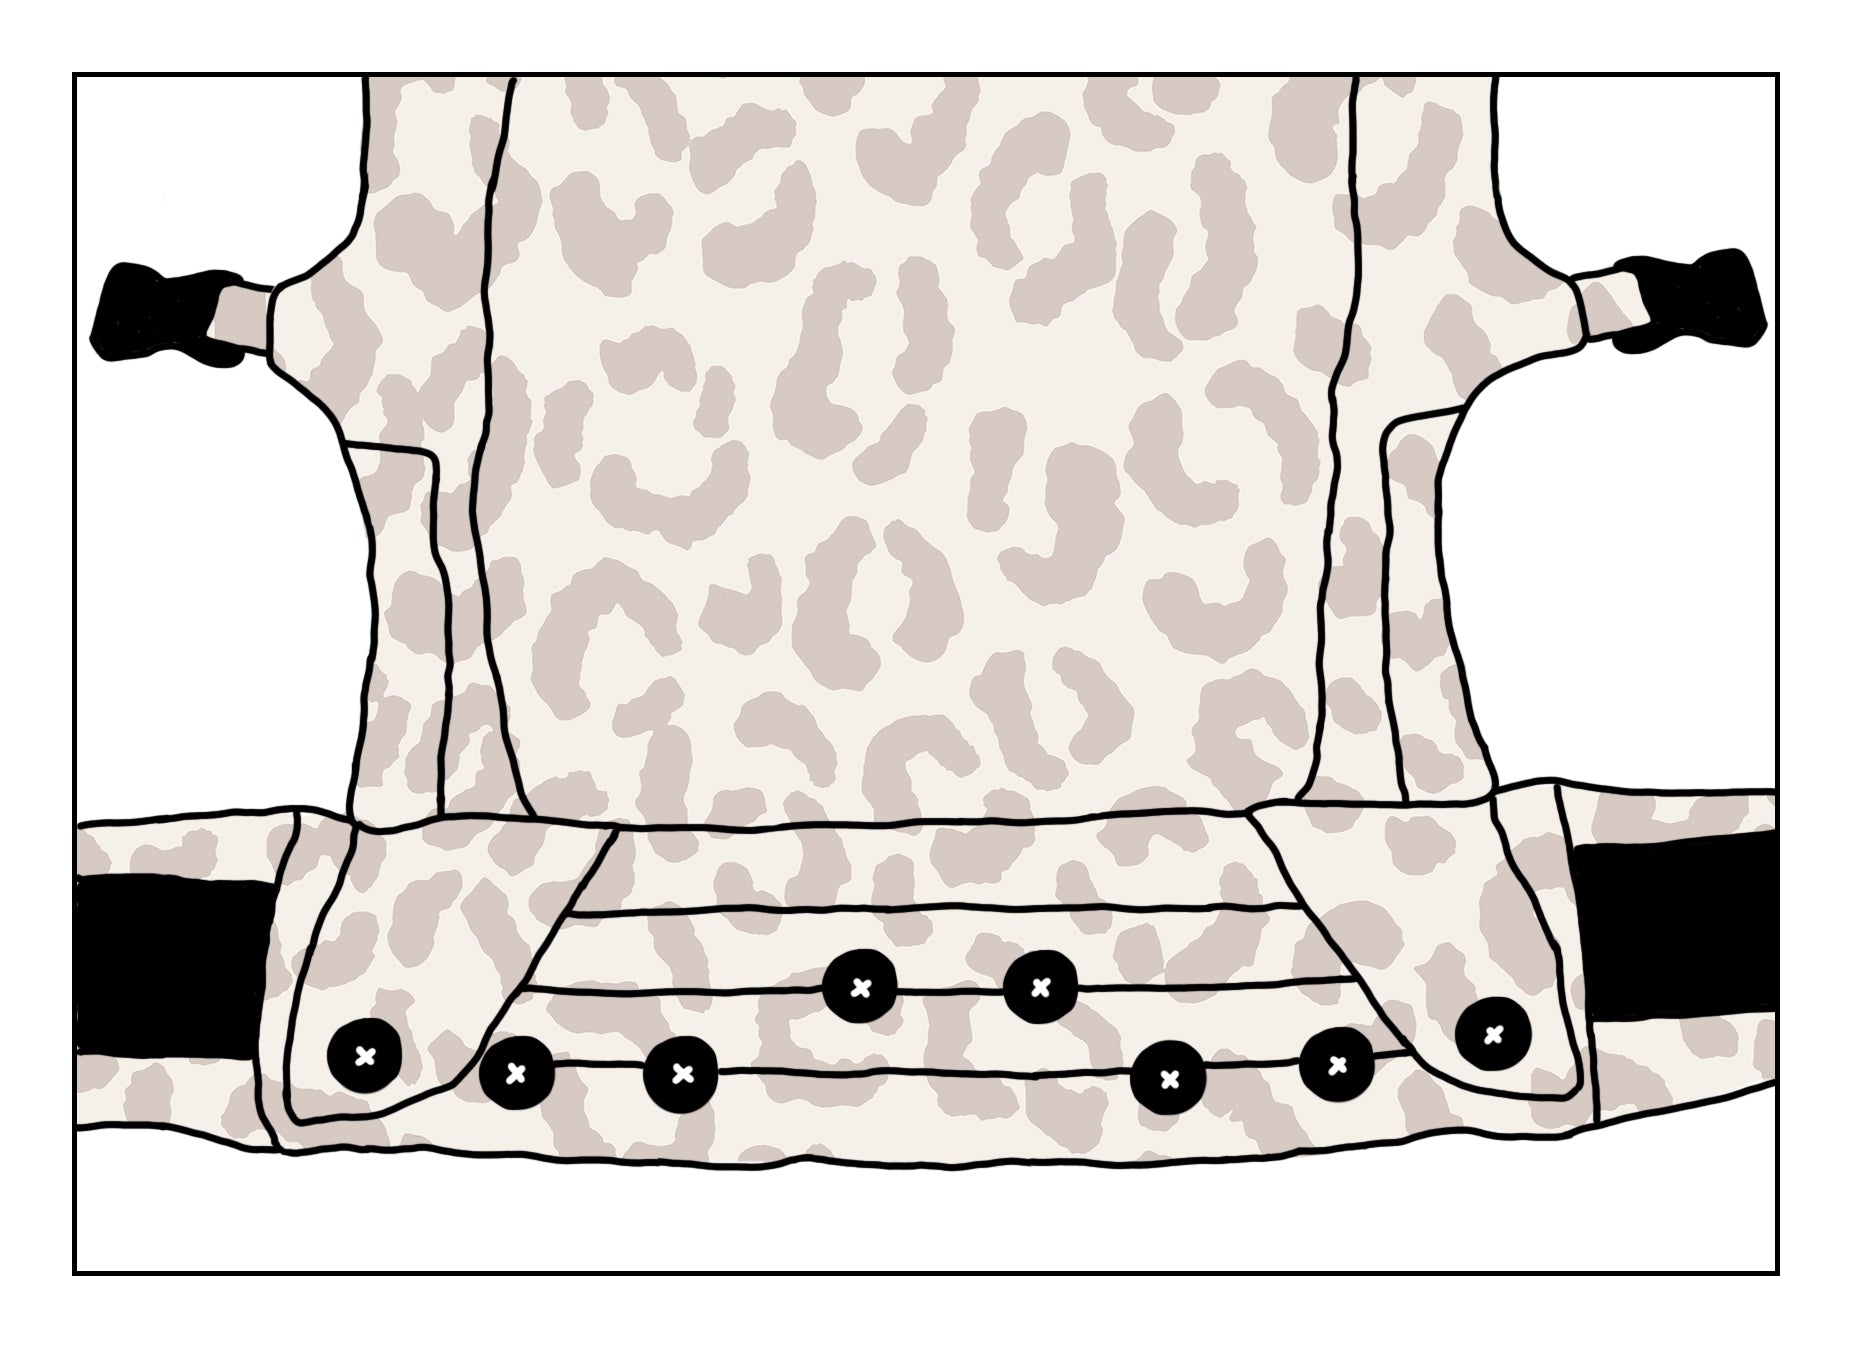
For an optimal squat spread position, the web width can be adjusted in 4 steps to the leg length of your baby. Set the bridge so wide that it reaches from the hollow of your child's knees to the hollow of his knees.
Please note: The months given are a guideline. This information may vary from baby to baby.
From birth
Adjust the stirrup to its lowest level by folding over the padded leg openings and securing to the top buttons.
From about 4 months
If you notice that the bridge is too narrow, you can use the 3rd button from the outside from about 4 months. Now you no longer have to fold down the leg openings.
From about 8 months
If you notice that the bar is set too narrow, you can use the next step from about 8 months.
From approx. 12 months
Now you can take the widest setting when your child is older.
Measure the web width
We'll show you how to measure the width of the bridge.
Step by step
Instructions Halfbuckle Baby Carrier Front
The Halfbuckle baby carrier grows with your baby. This means that settings on the baby carrier need to be changed over time.
When putting on the hip belt, make sure that the carrier sits centrally (i.e. not shifted to the right/left) and that it is better to place it a little too high than too low.
You should be able to kiss your baby on the head. Does the buckle on the back bother you? No problem, you can push it to the side before putting it on and close it there.
Do you want your baby to be able to face forward? Please wait until he can hold his head up on his own and then carry him on your back . He should never be carried in the front of the carrier facing forward.
Why not? Because it can be harmful to your child's hips. The back cannot round and the spread-squat position cannot be maintained. The baby can also suffer from sensory overload because it cannot turn its head away. However, you can carry it on your back as soon as it can sit up on its own.
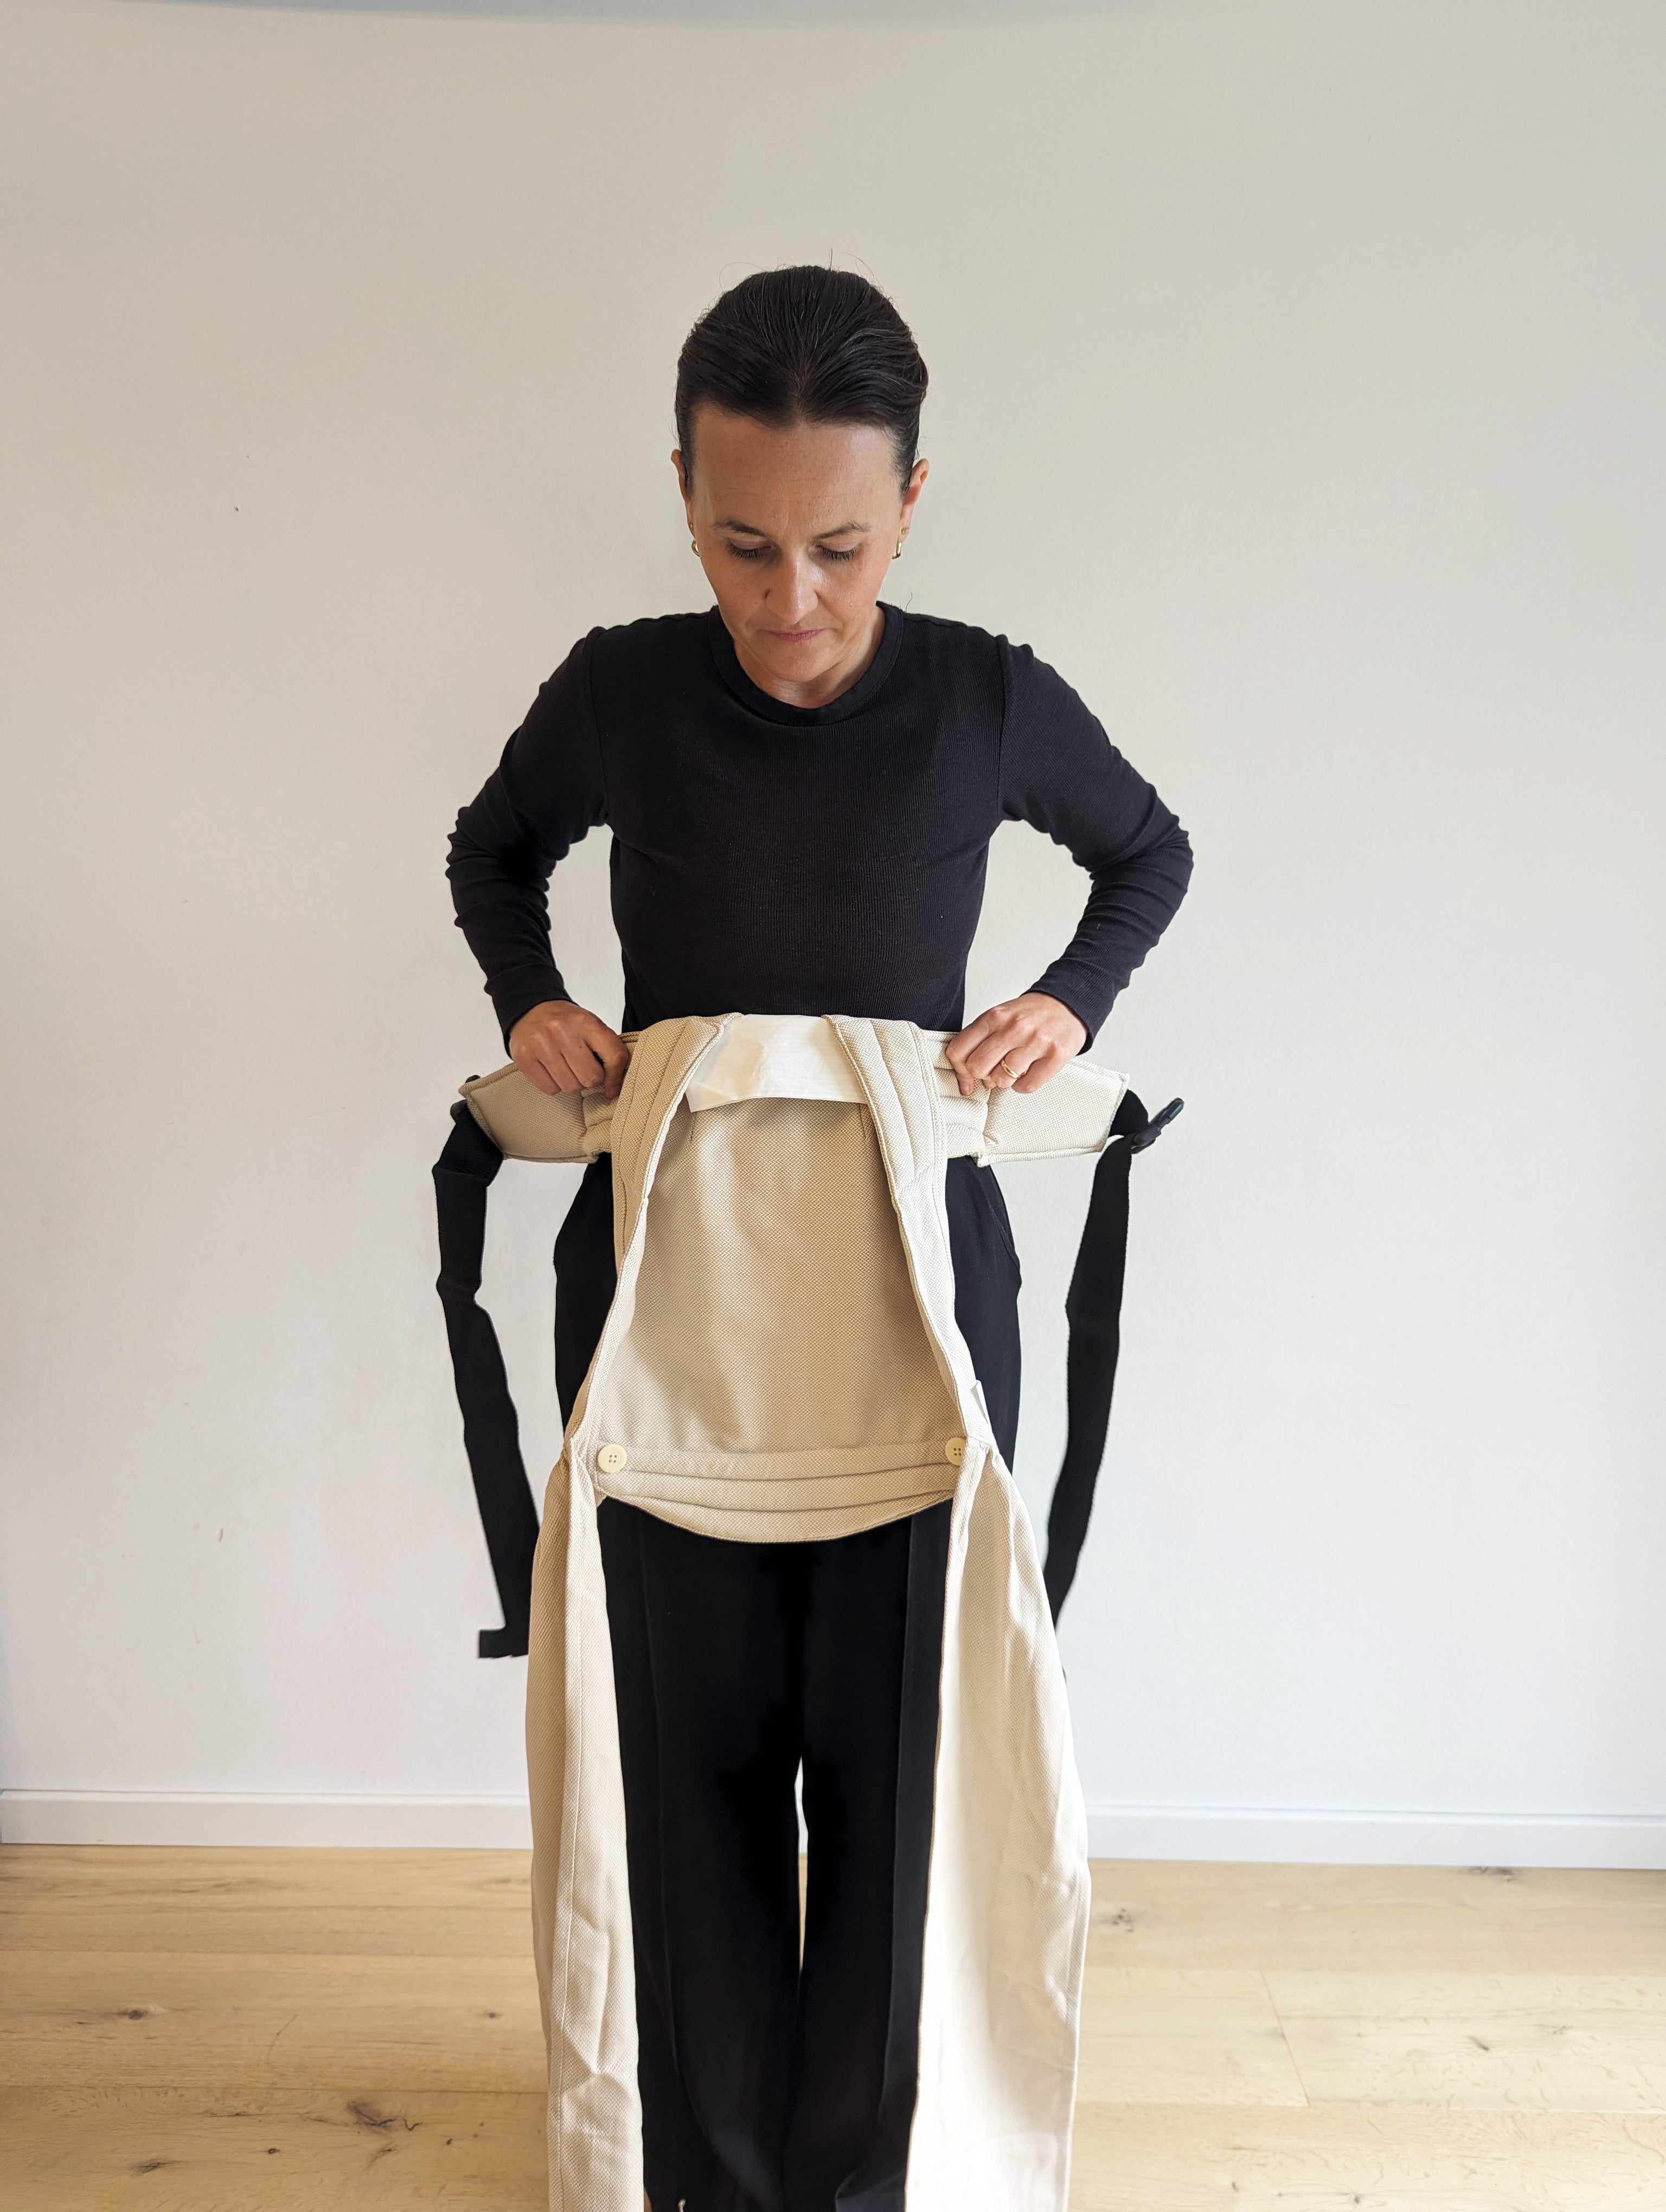
step 1
Hold the baby carrier facing you and overhead in front of you. Fold down the waist belt. Place hip belt at waist. Depending on the size of the child: further up or down.
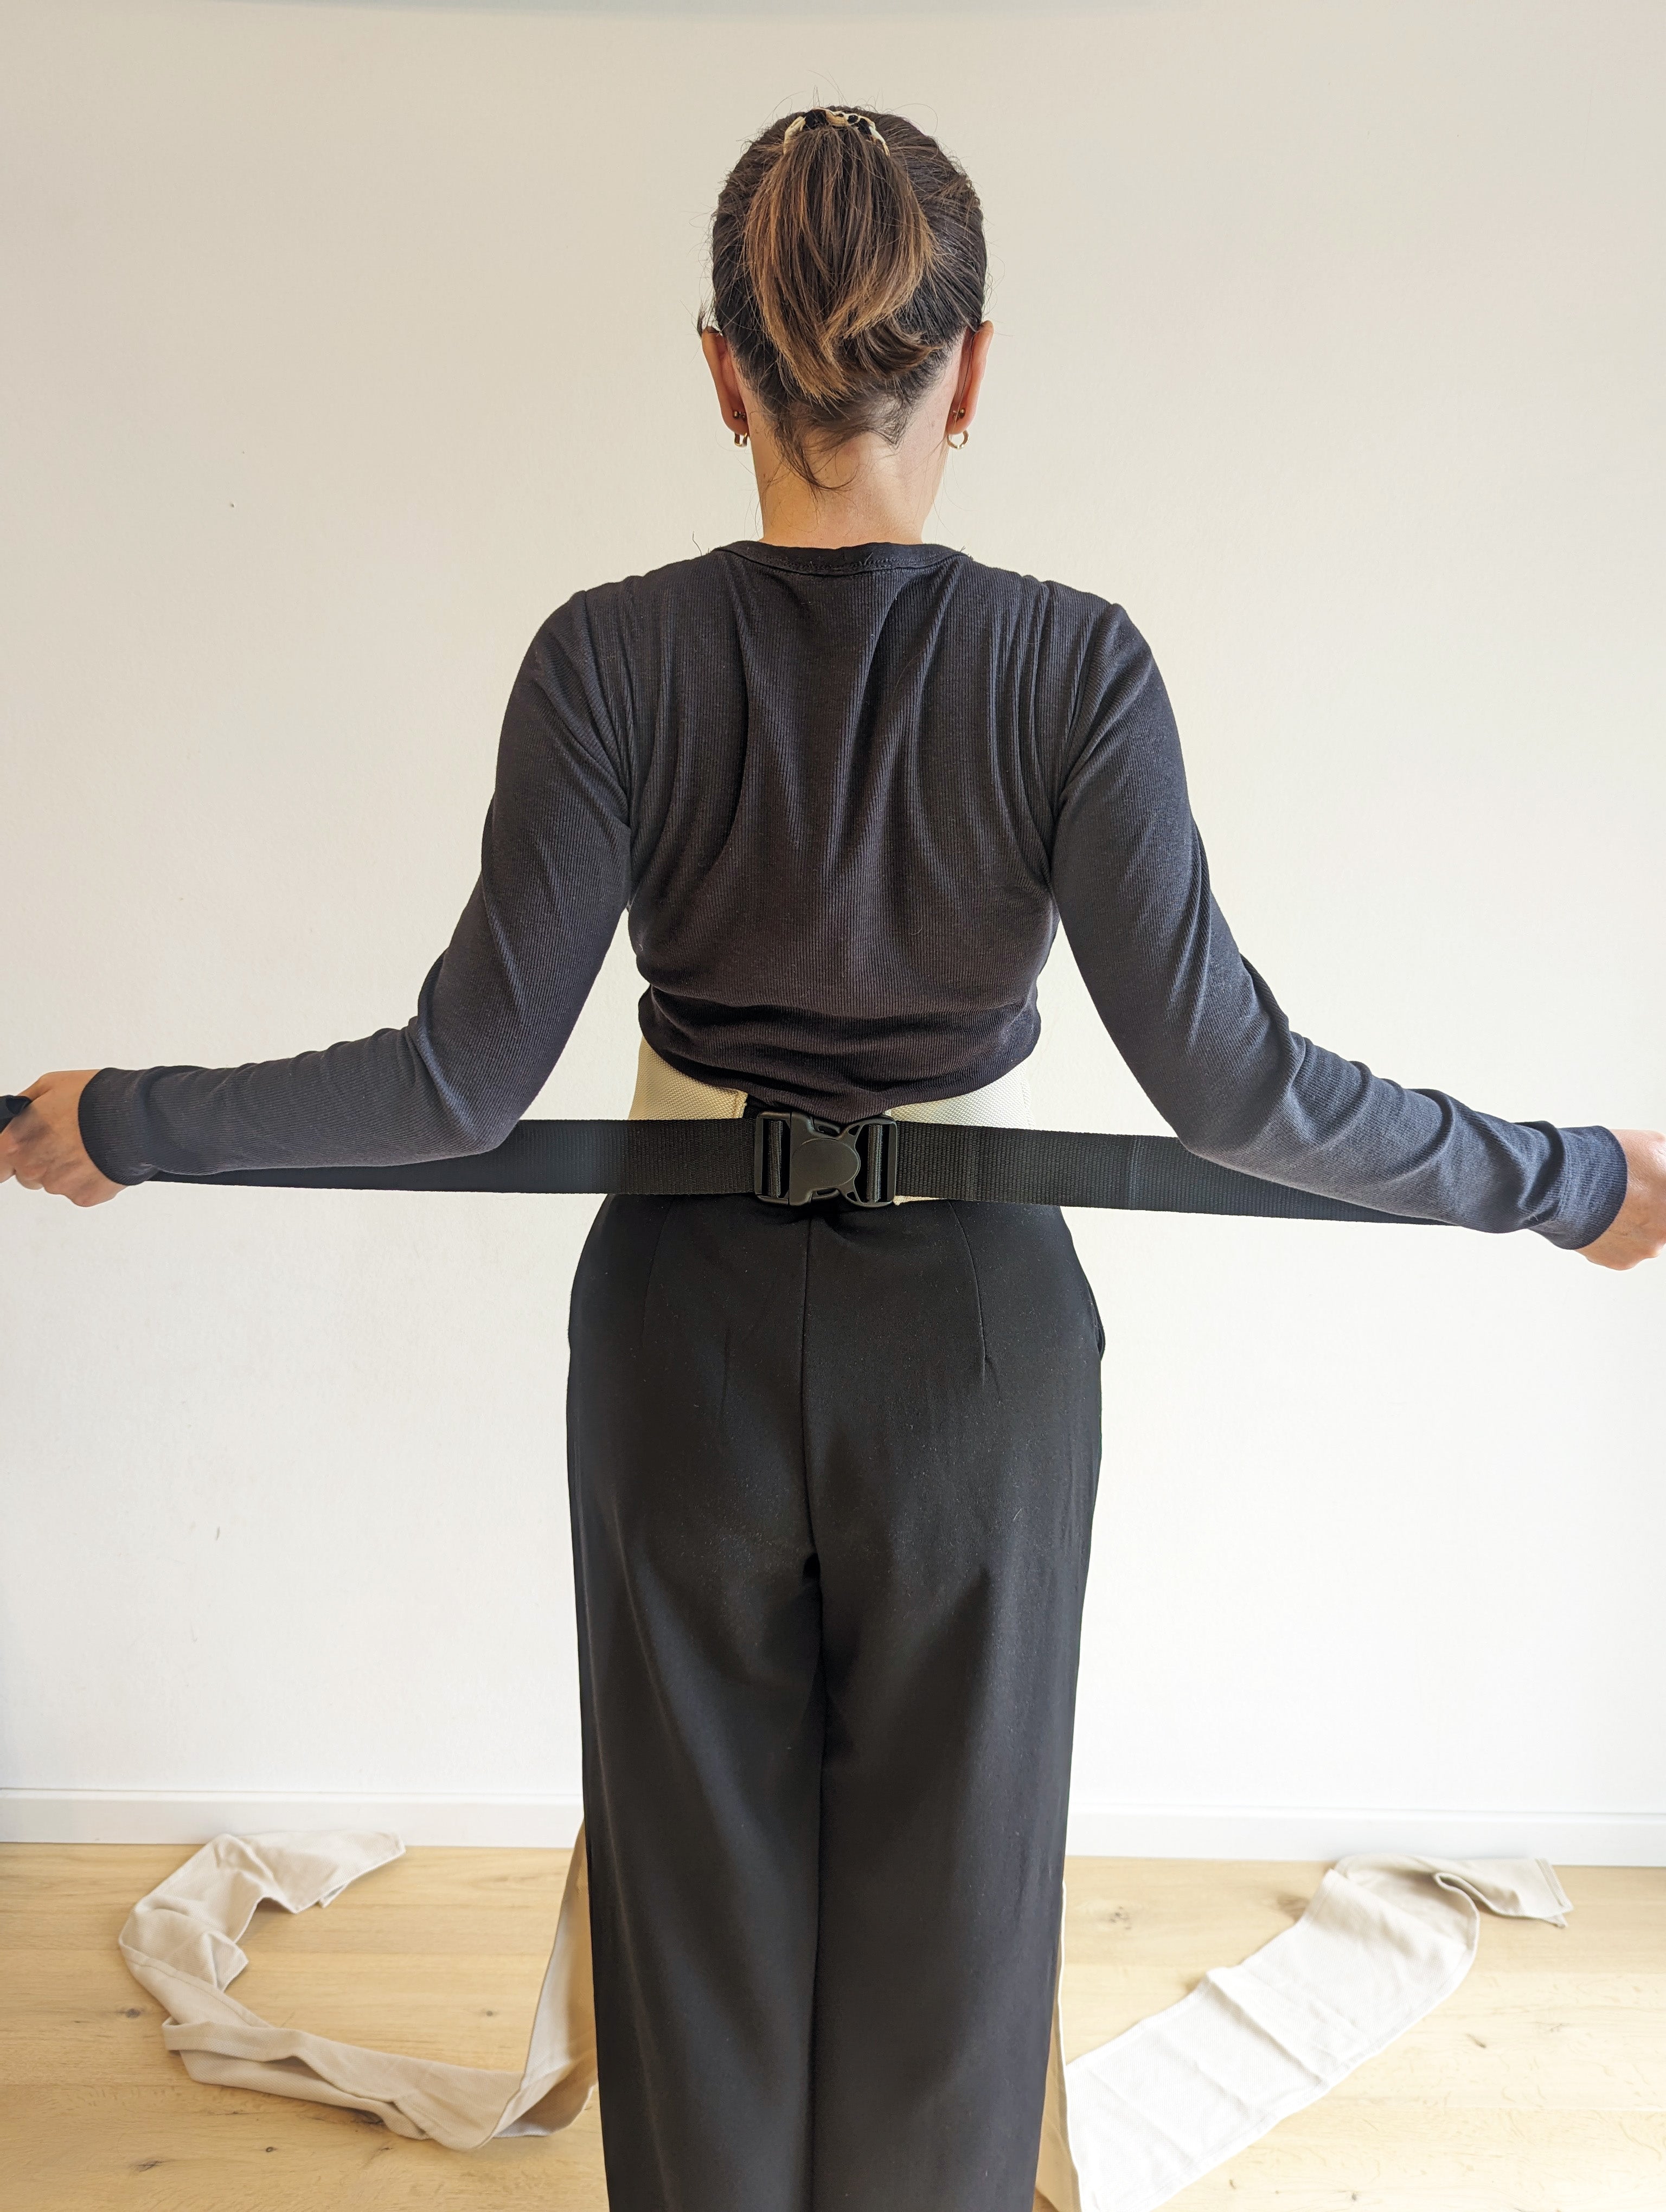
step 2
Close the hip belt using the buckle and tighten.
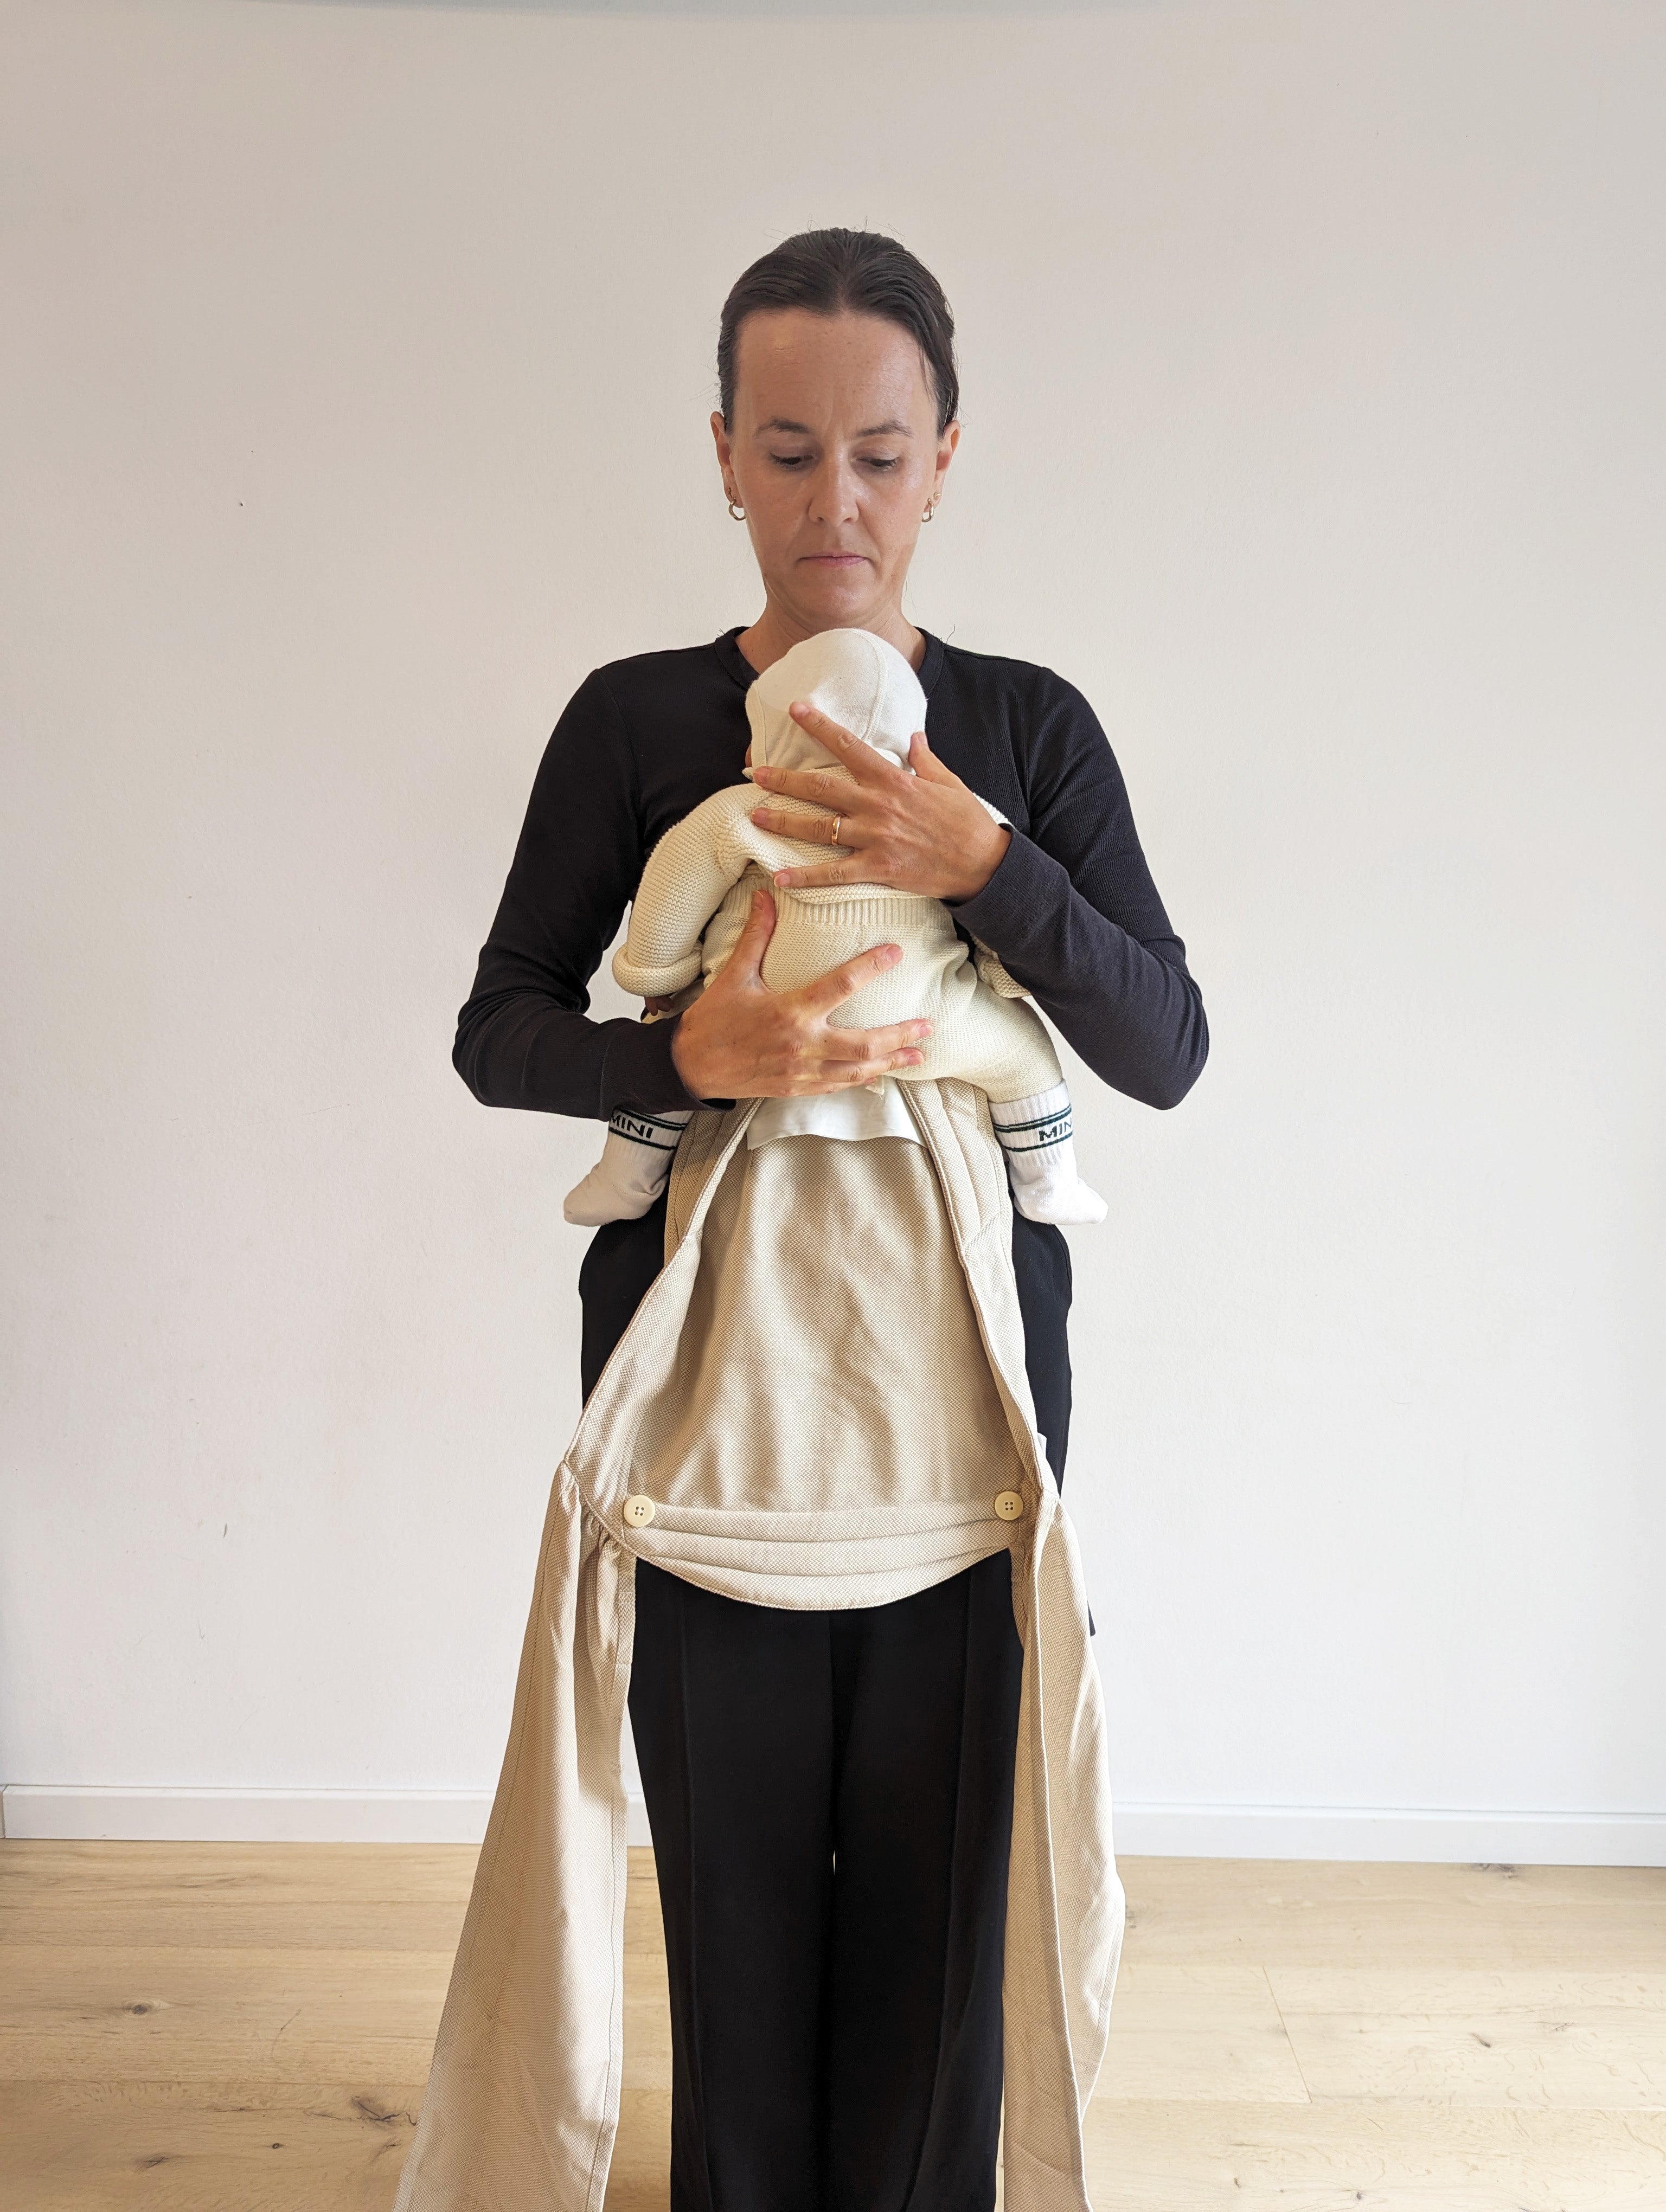
step 3
Place your child in the carrier with the belly facing you over the hip belt. So that your bodies touch. Pay attention to the correct squat spread posture. The legs should be tucked at at least a right angle. This means that the knees must be higher than the buttocks and not hang straight down

step 4
Fold up the front of the carrier. Always keep one hand on the child. Place the first shoulder strap over your shoulder.
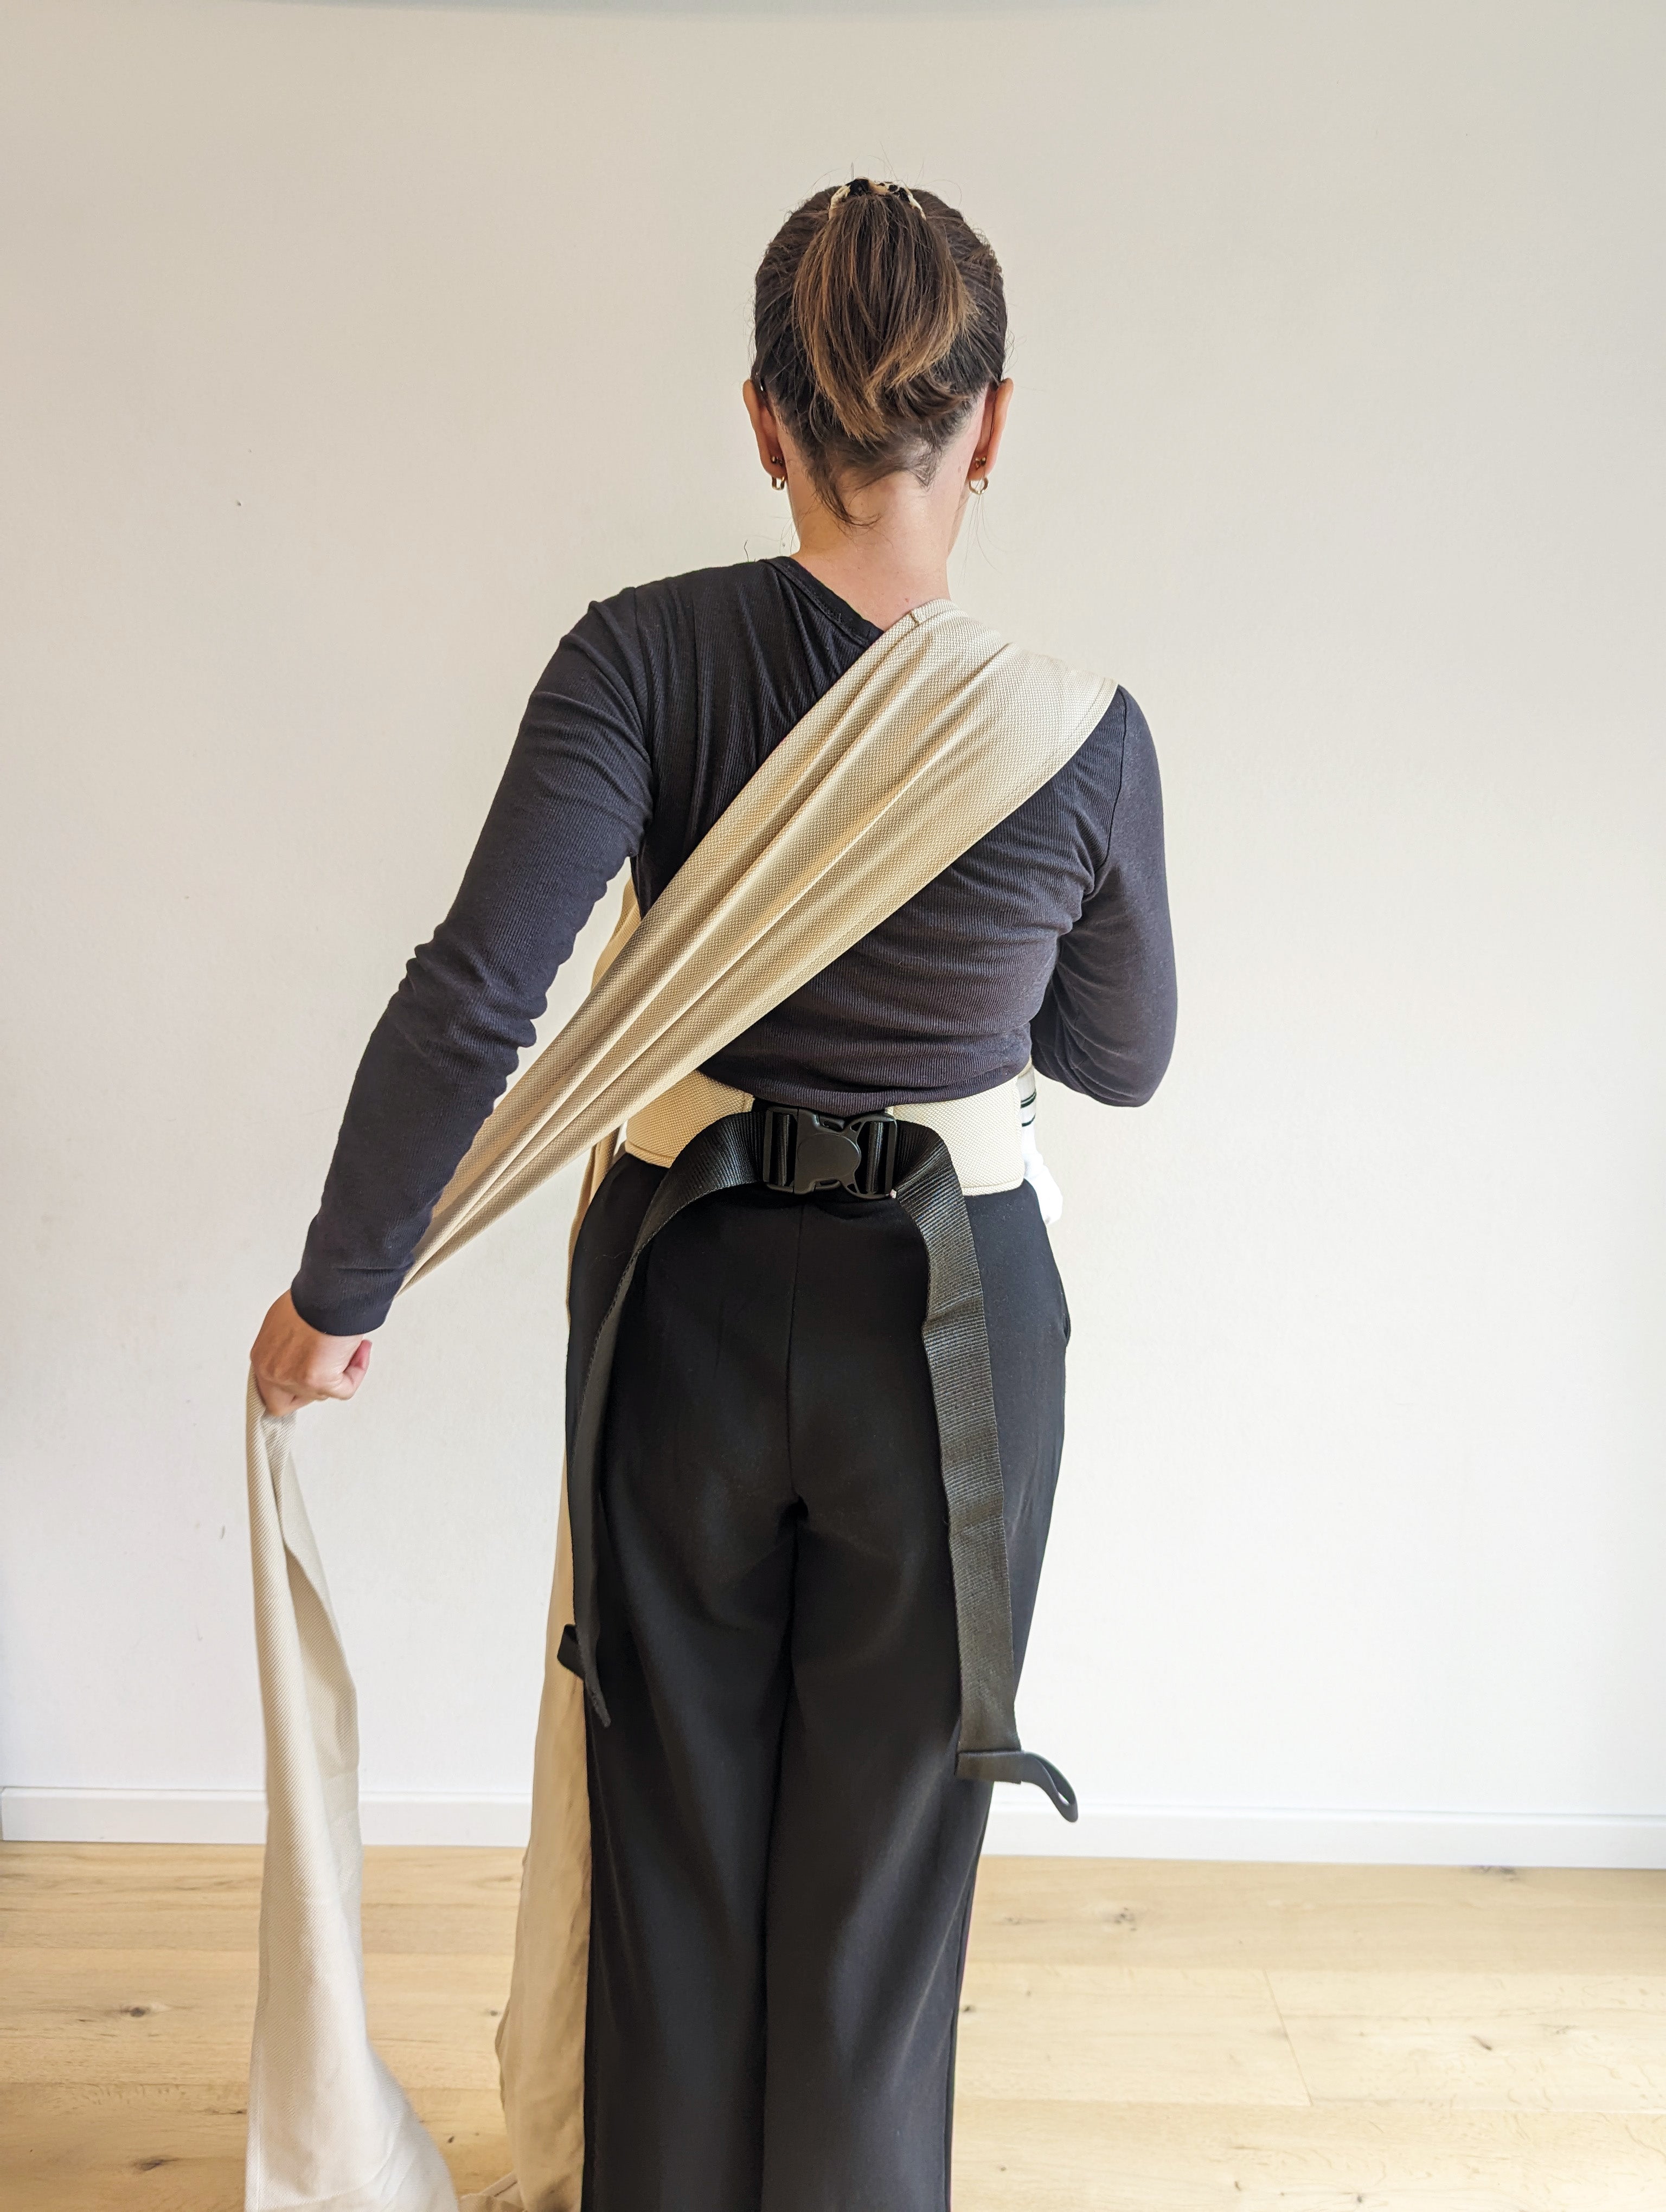
step 5
Pull the shoulder strap back towards you in a criss-cross pattern. Pass it under your baby's feet and hold it in front.
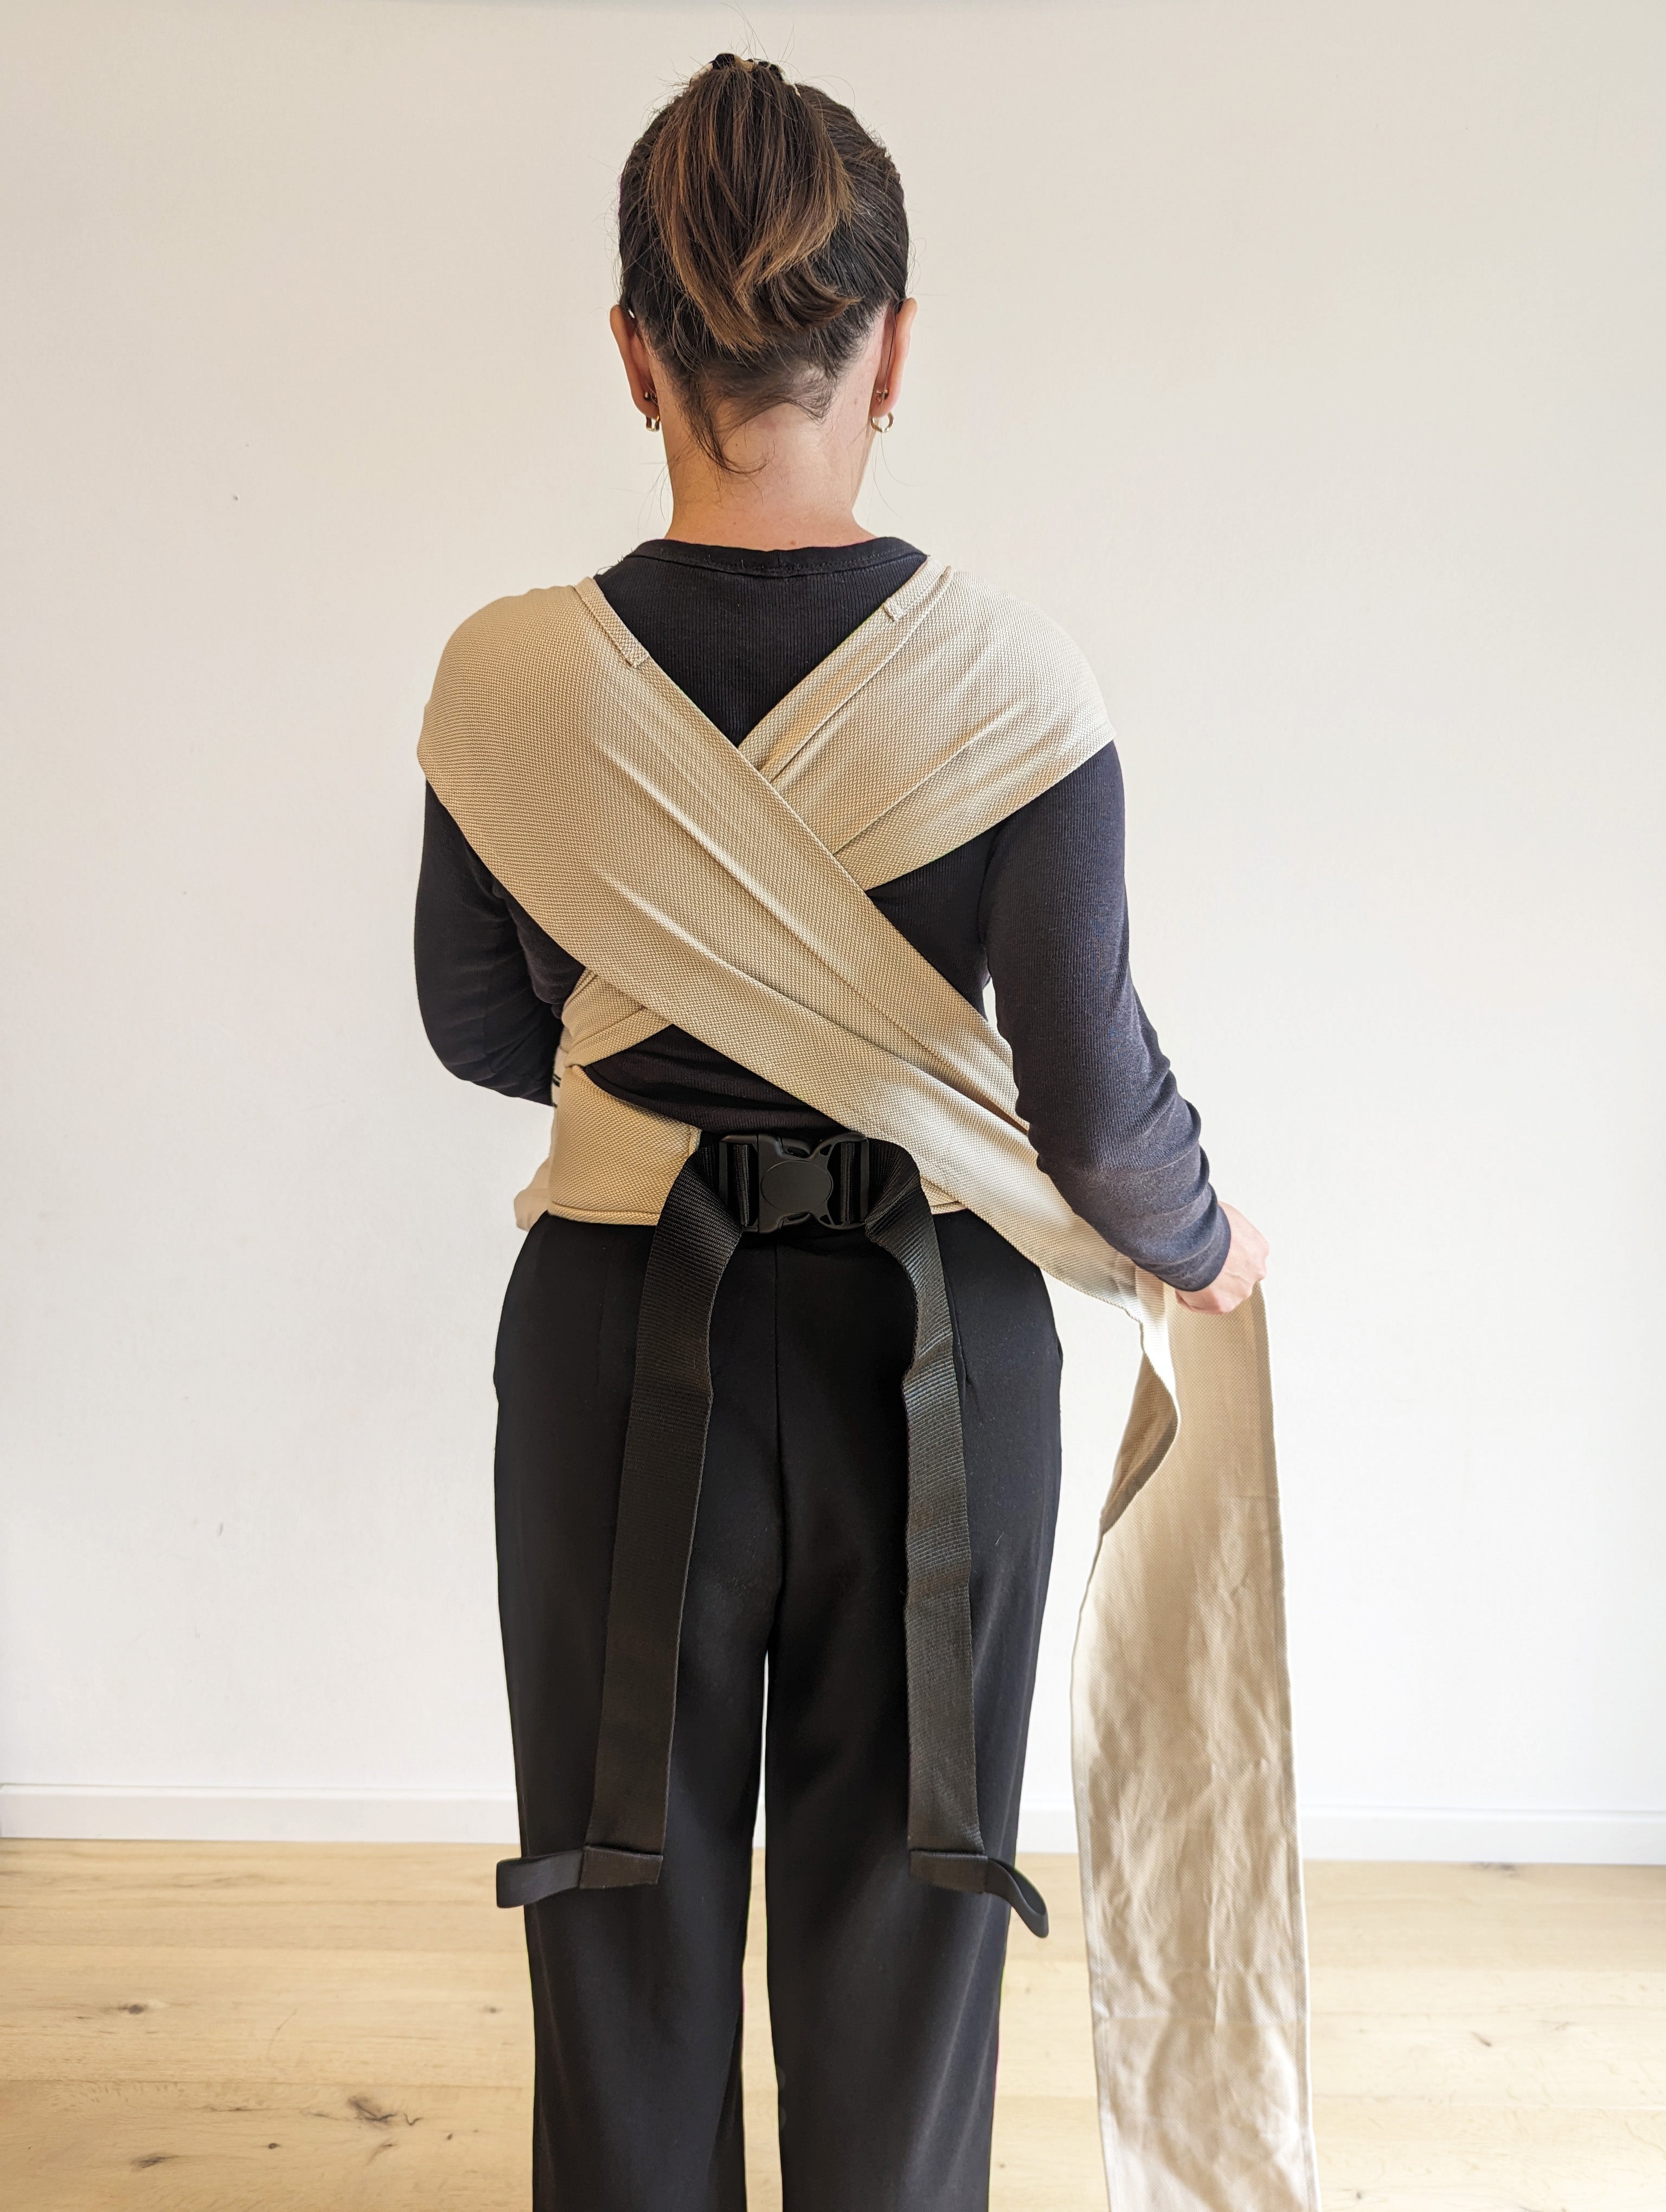
step 6
Repeat step 5 with the other side.
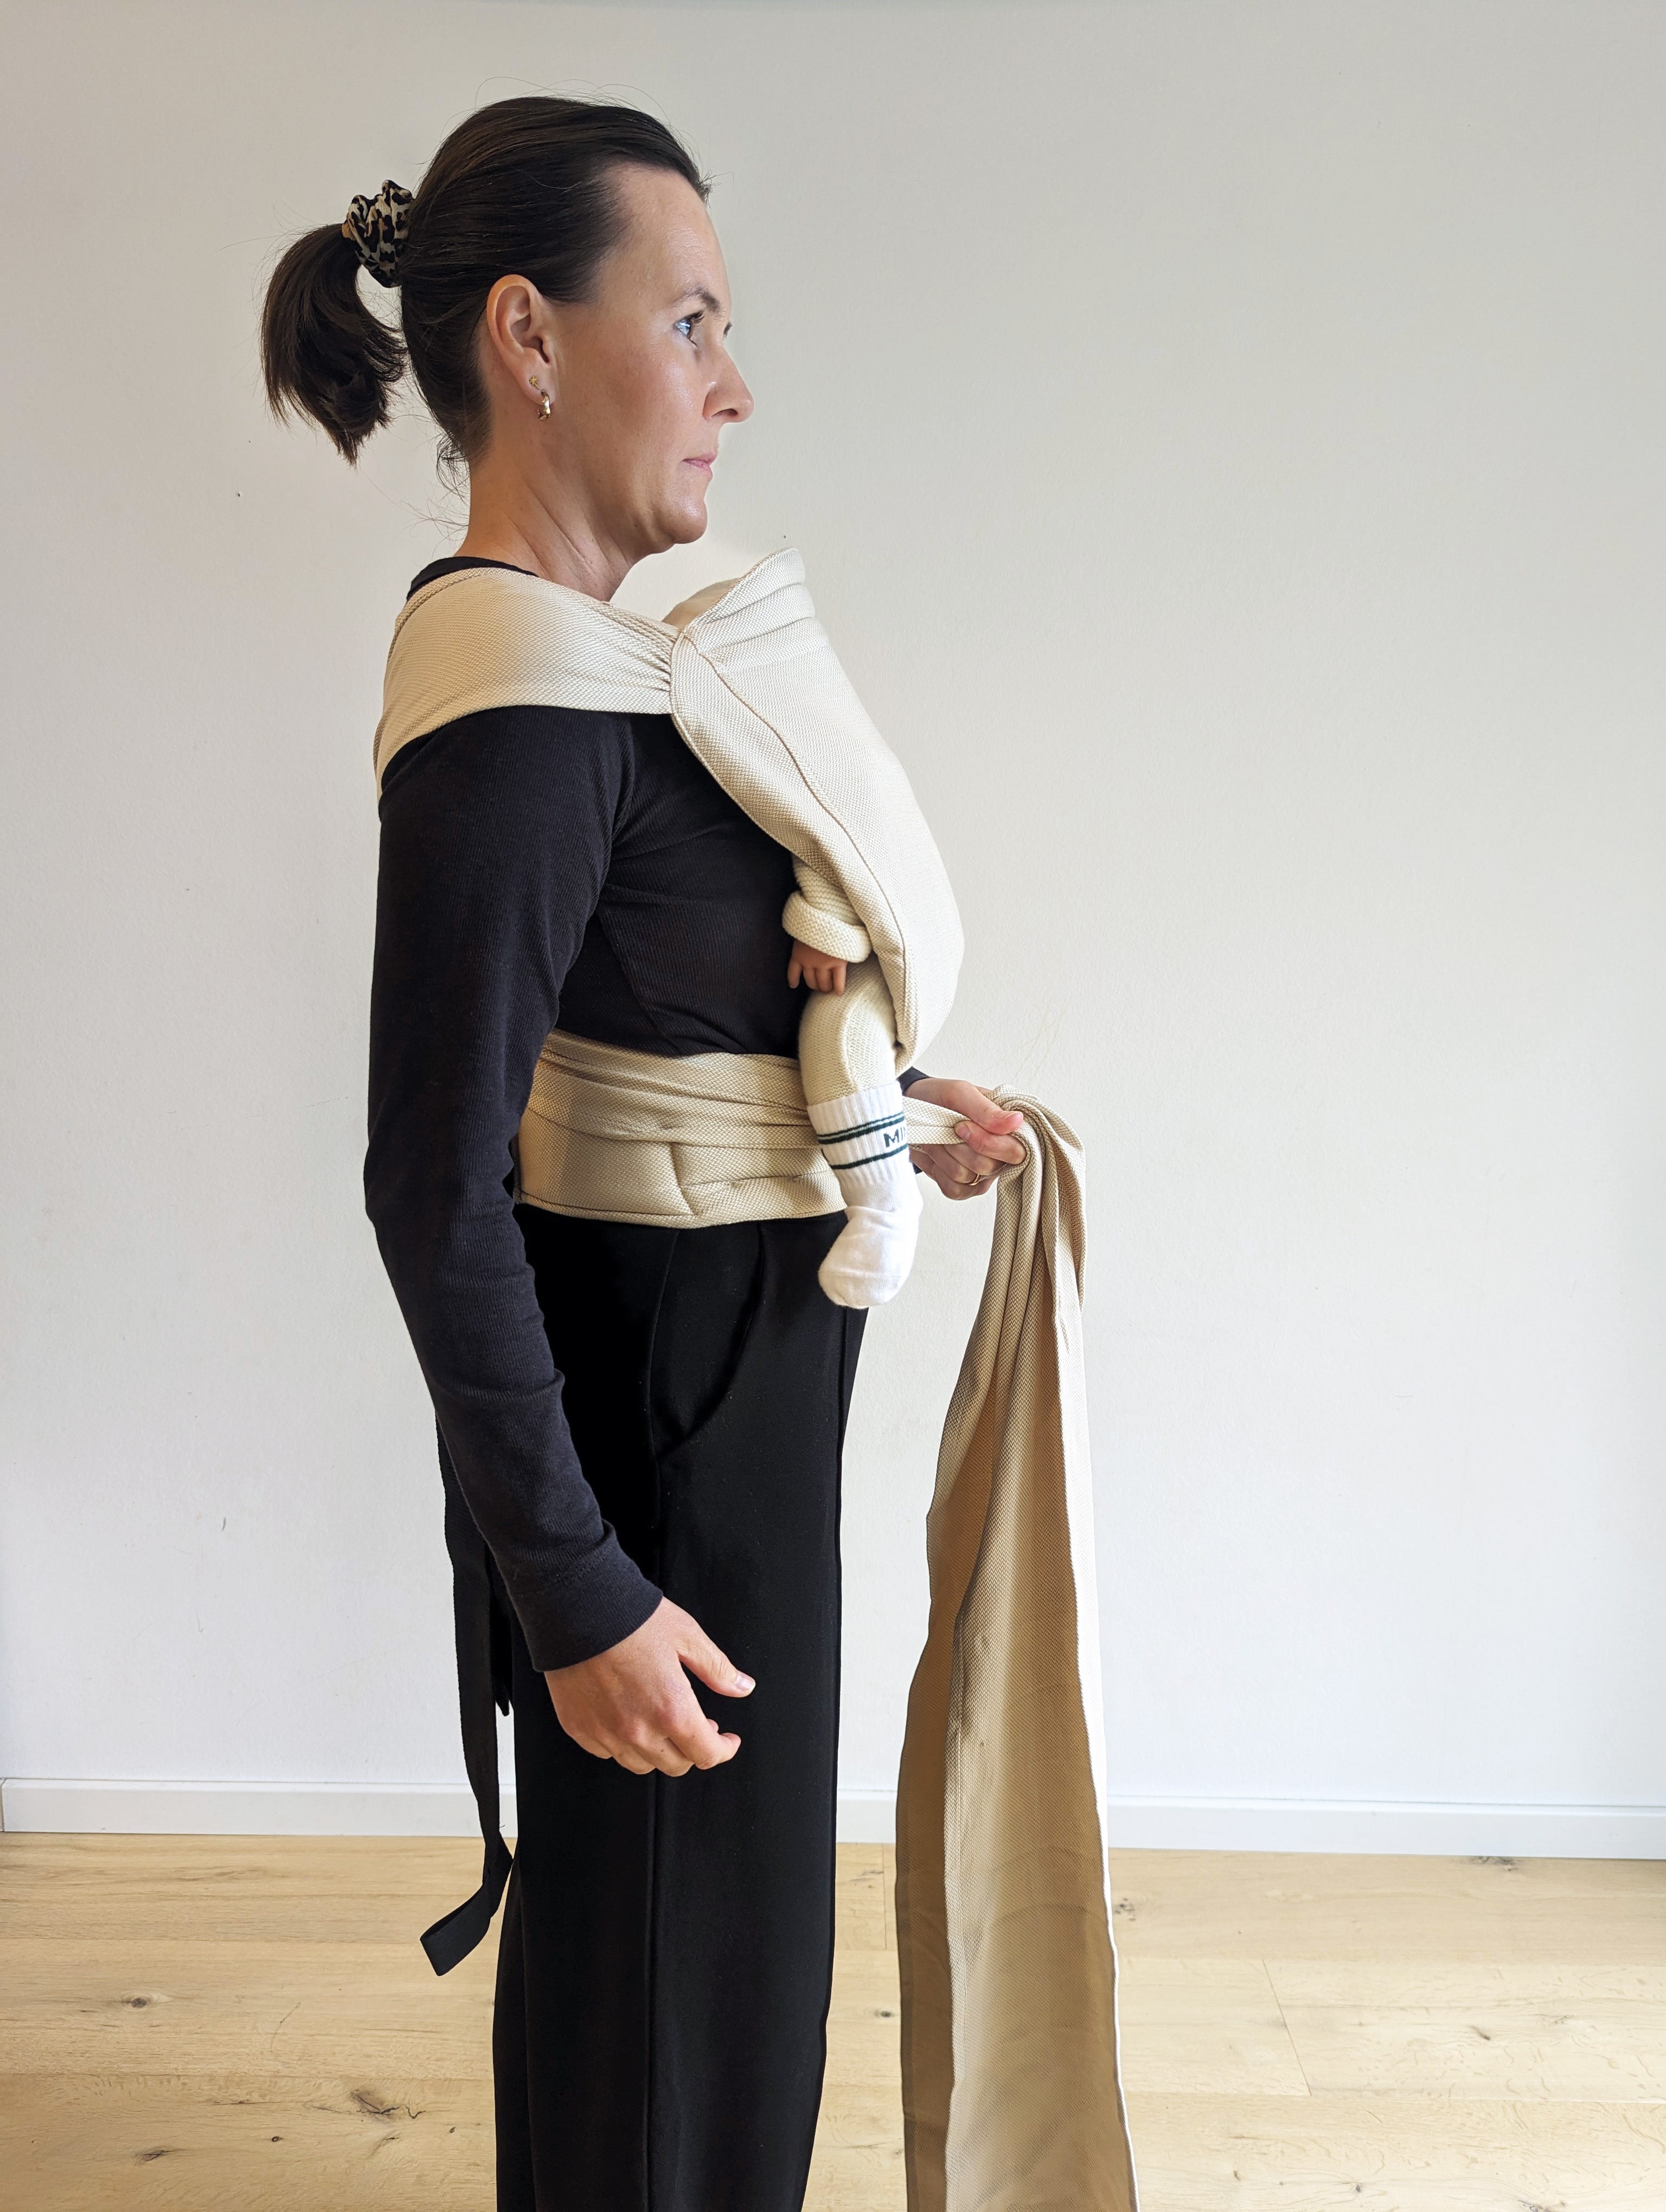
step 7
Now hold both shoulder straps in your hands. Let your baby slide further into the carrier before tying the knot.
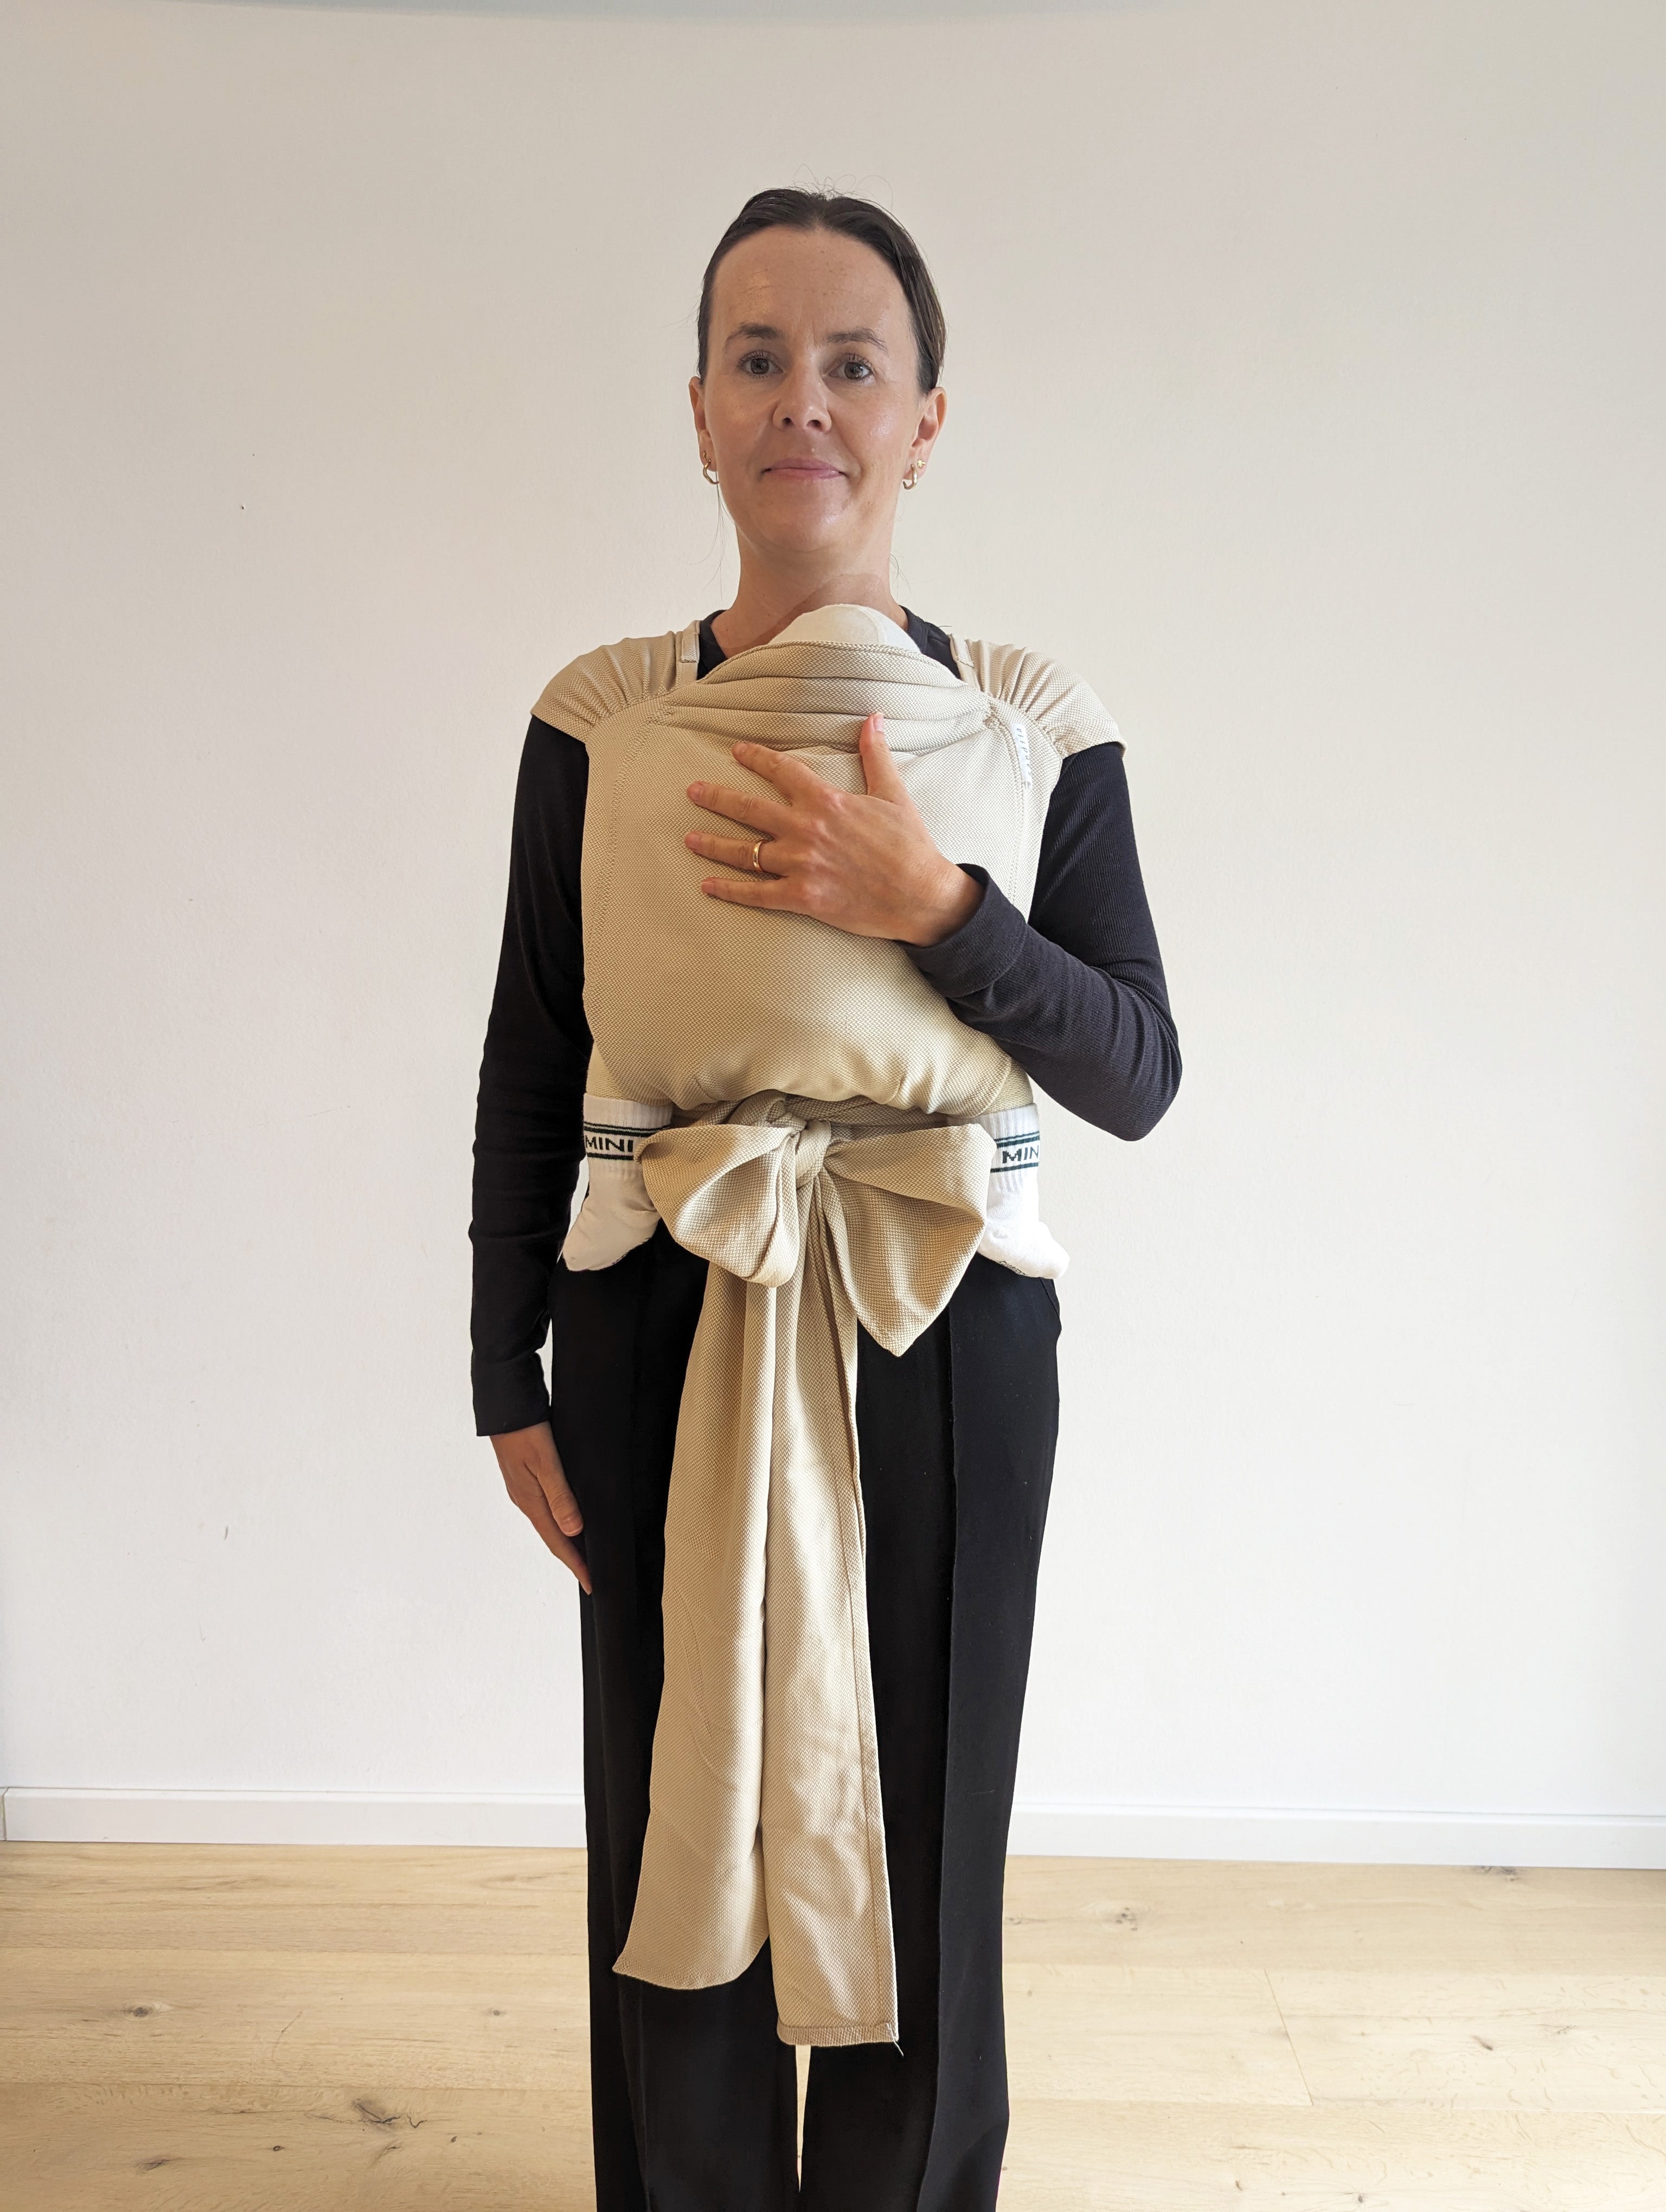
step 8
You can either tie the knot at the front or lead the strands back to the back and tie a knot there.
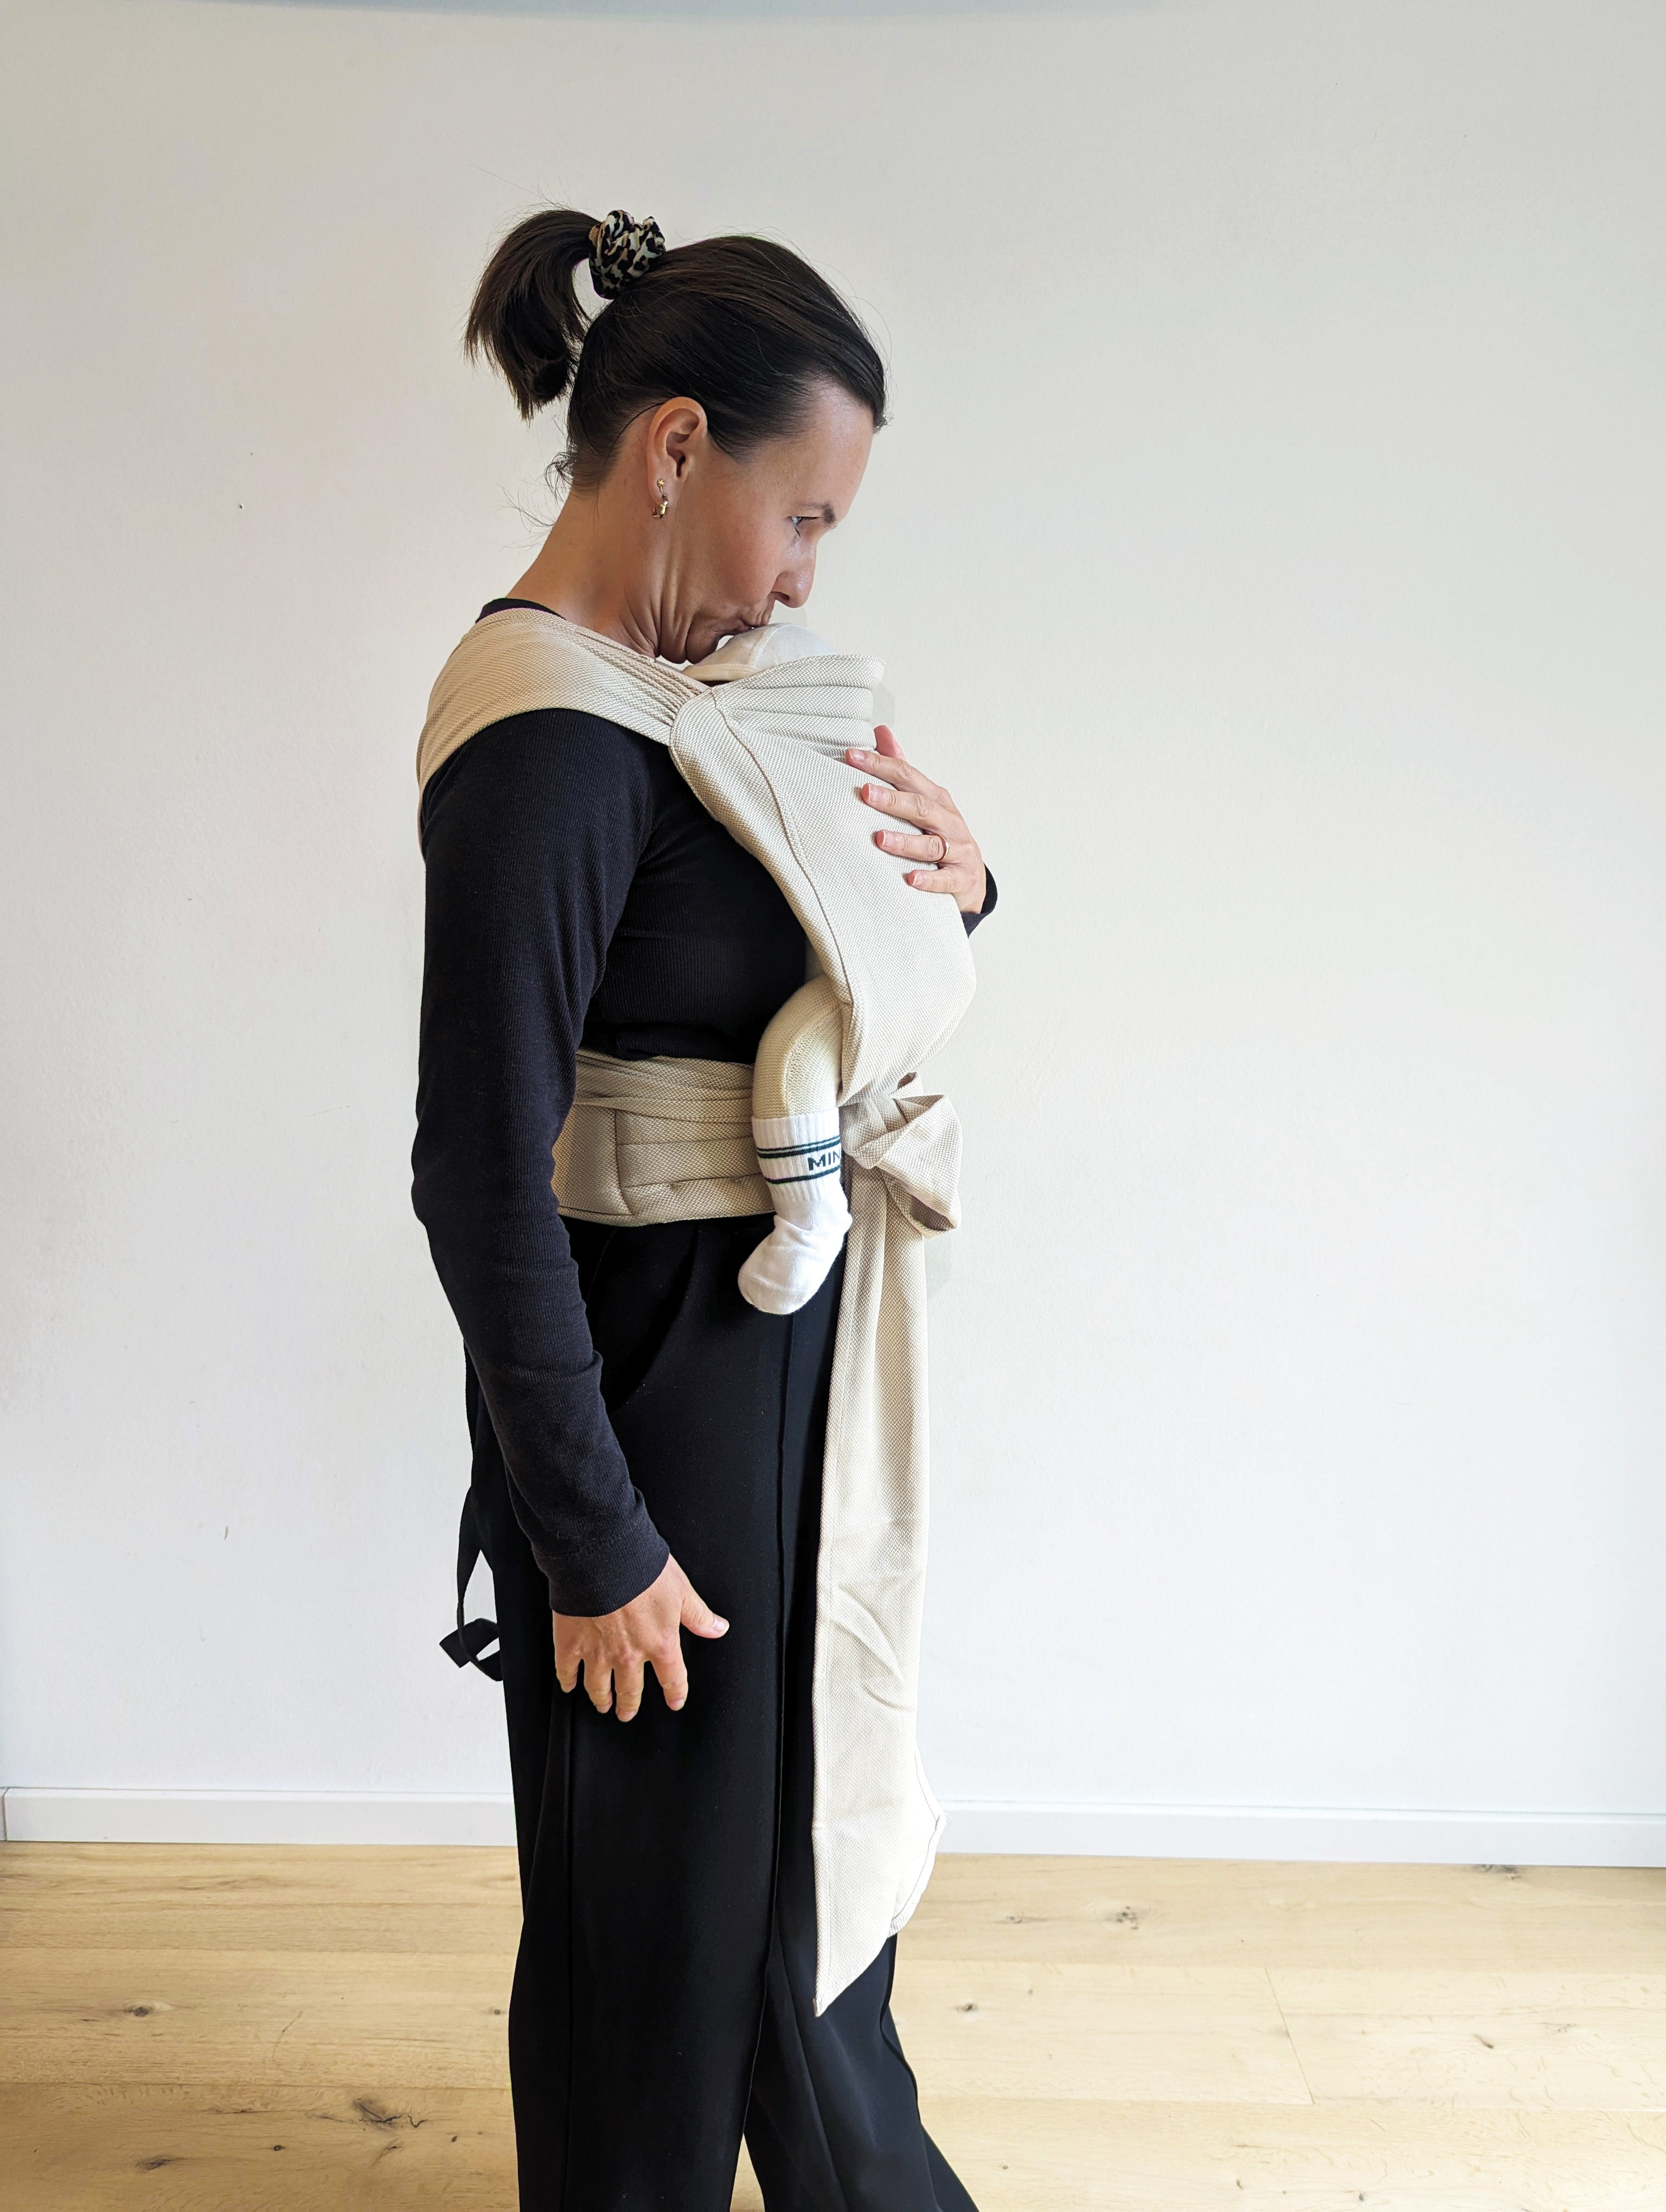
step 9
Is your baby sitting at head-kissing height? Perfect!

Tutorial
Here you can see how you can easily put the carrier on. (sound on!)
We help you!
Book your free babywearing consultation!
We offer you a FREE babywearing consultation with our professional babywearing consultant. If you are still unsure how to put on your sandiia® baby carrier correctly, please take a look at our tutorials and instructions first.
Are you still unsure or do you have the feeling that something is not quite right?
No problem, we are there for you.