
Step by step
Hipster carrier instructions
Babywearing has so many benefits – but hey, safety first! Make sure you feel secure and comfortable when carrying your baby. Give your baby carrier a quick check before you set off each time and see if there's any damage. If anything seems off, it's best to stop using the carrier and ask the sandiia® team for advice.
The sandiia® Hipster is designed so symmetrically that it adapts flexibly to you – regardless of whether you prefer to wear it on your left or right.
The fully padded strap and the padded buckle are particularly comfortable.
And this is how you put on the sandiia® hip carrier:

step 1
Hold the baby carrier facing you and overhead in front of you.

step 2
Fold down the waist belt. Place hip belt at waist. Depending on the size of the child: further up or down.

step 3
Close the hip belt using the buckle and tighten.

step 4
Place your child in the carrier with the belly facing you over the hip belt. So that your bodies touch. Pay attention to the correct squat spread posture. The legs should be tucked at at least a right angle. This means that the knees must be higher than the buttocks and not hang straight down
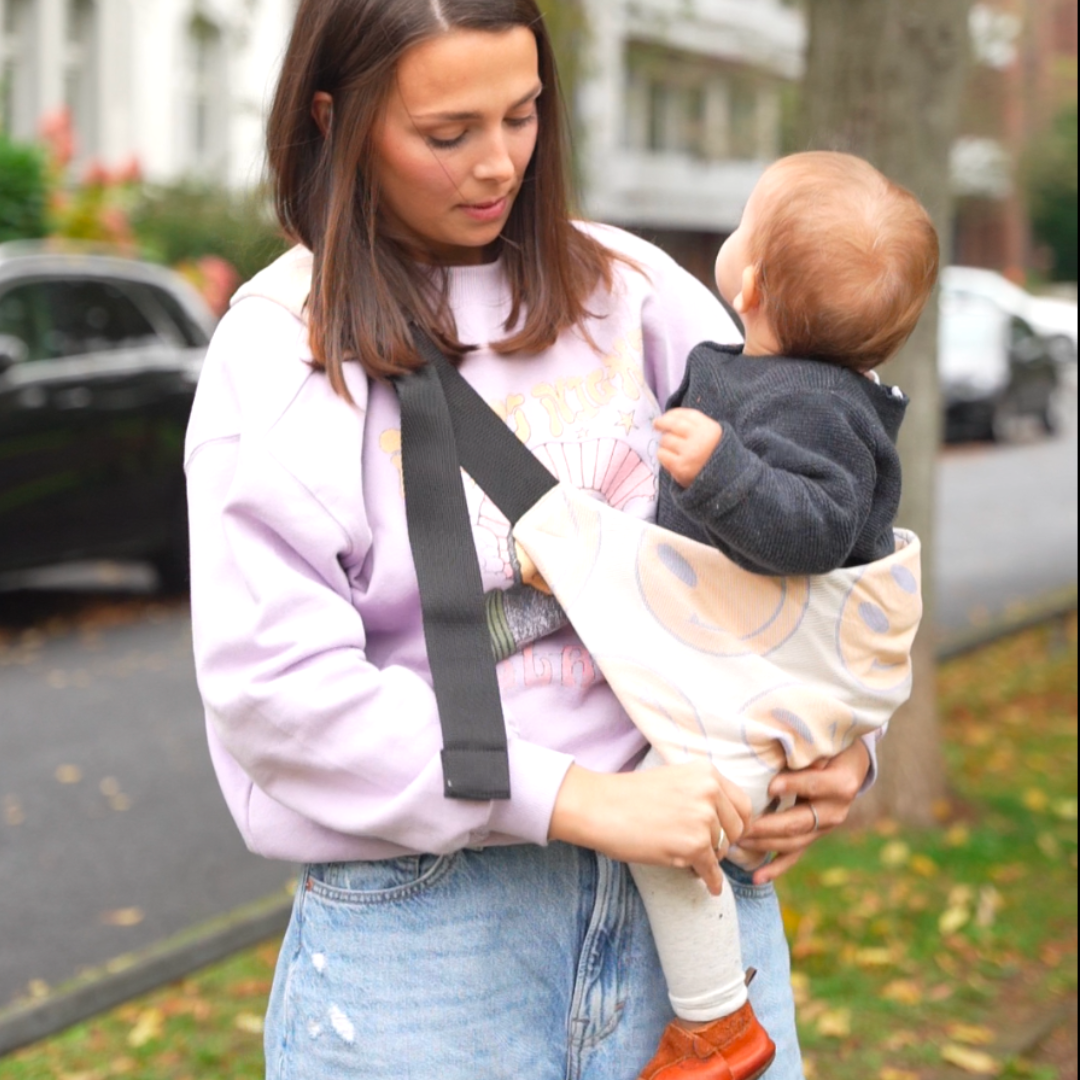
step 5
Flip up the front of the stretcher. Always keep one hand on the child.

step 6
Now fasten the first shoulder strap crosswise using the buckle
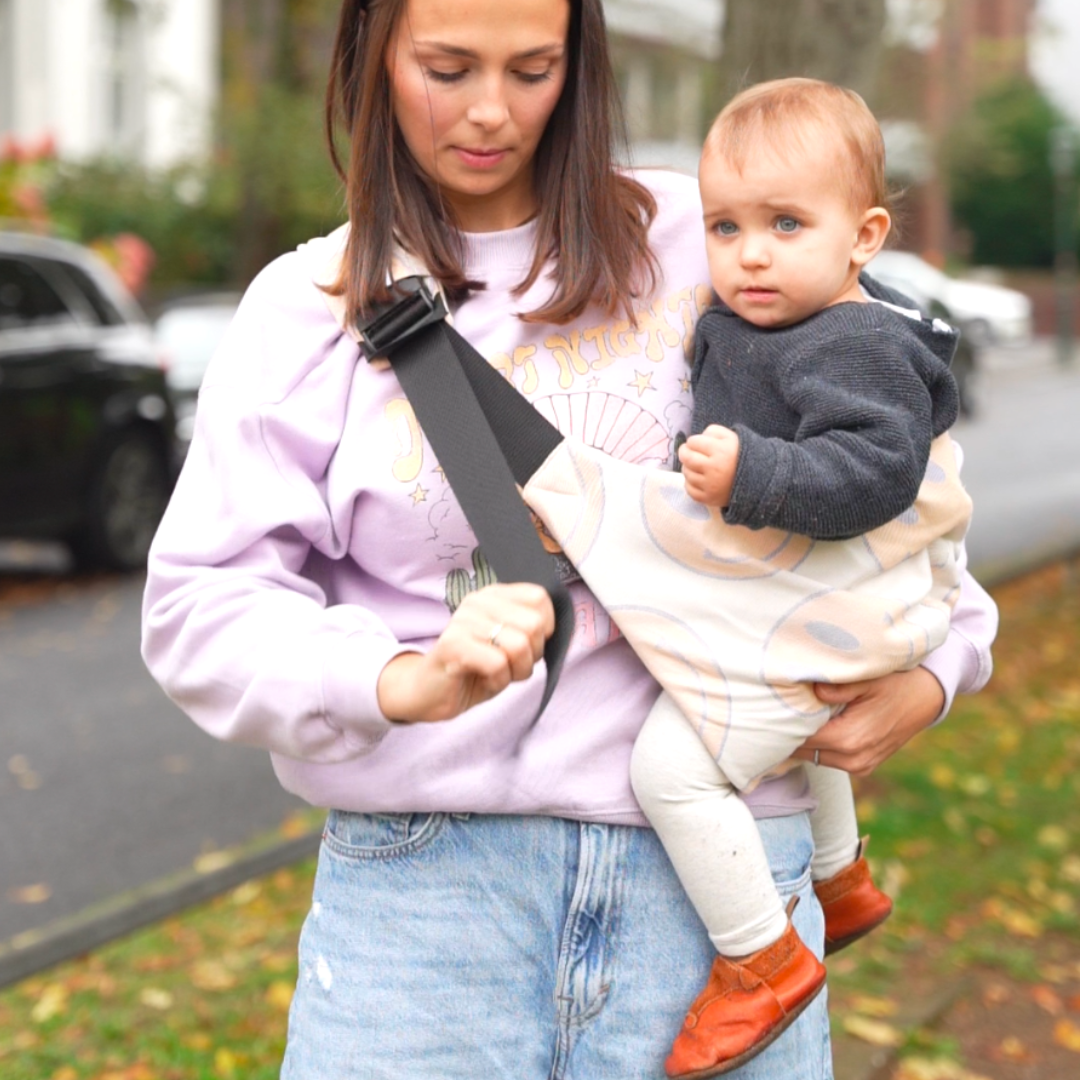
step 7
Tighten the strap. Make sure that your baby's hands are not constricted. You can roll up the buckles and fasten them with the elastic.

step 8