Baby carrier back instructions
Your baby is getting bigger and wants to explore the world? It can already hold its head up on its own? Then it's time to carry the baby carrier on your back. We'll show you how it's done using a small baby doll. Please make sure that your baby is big enough that his head can reach out of the carrier.
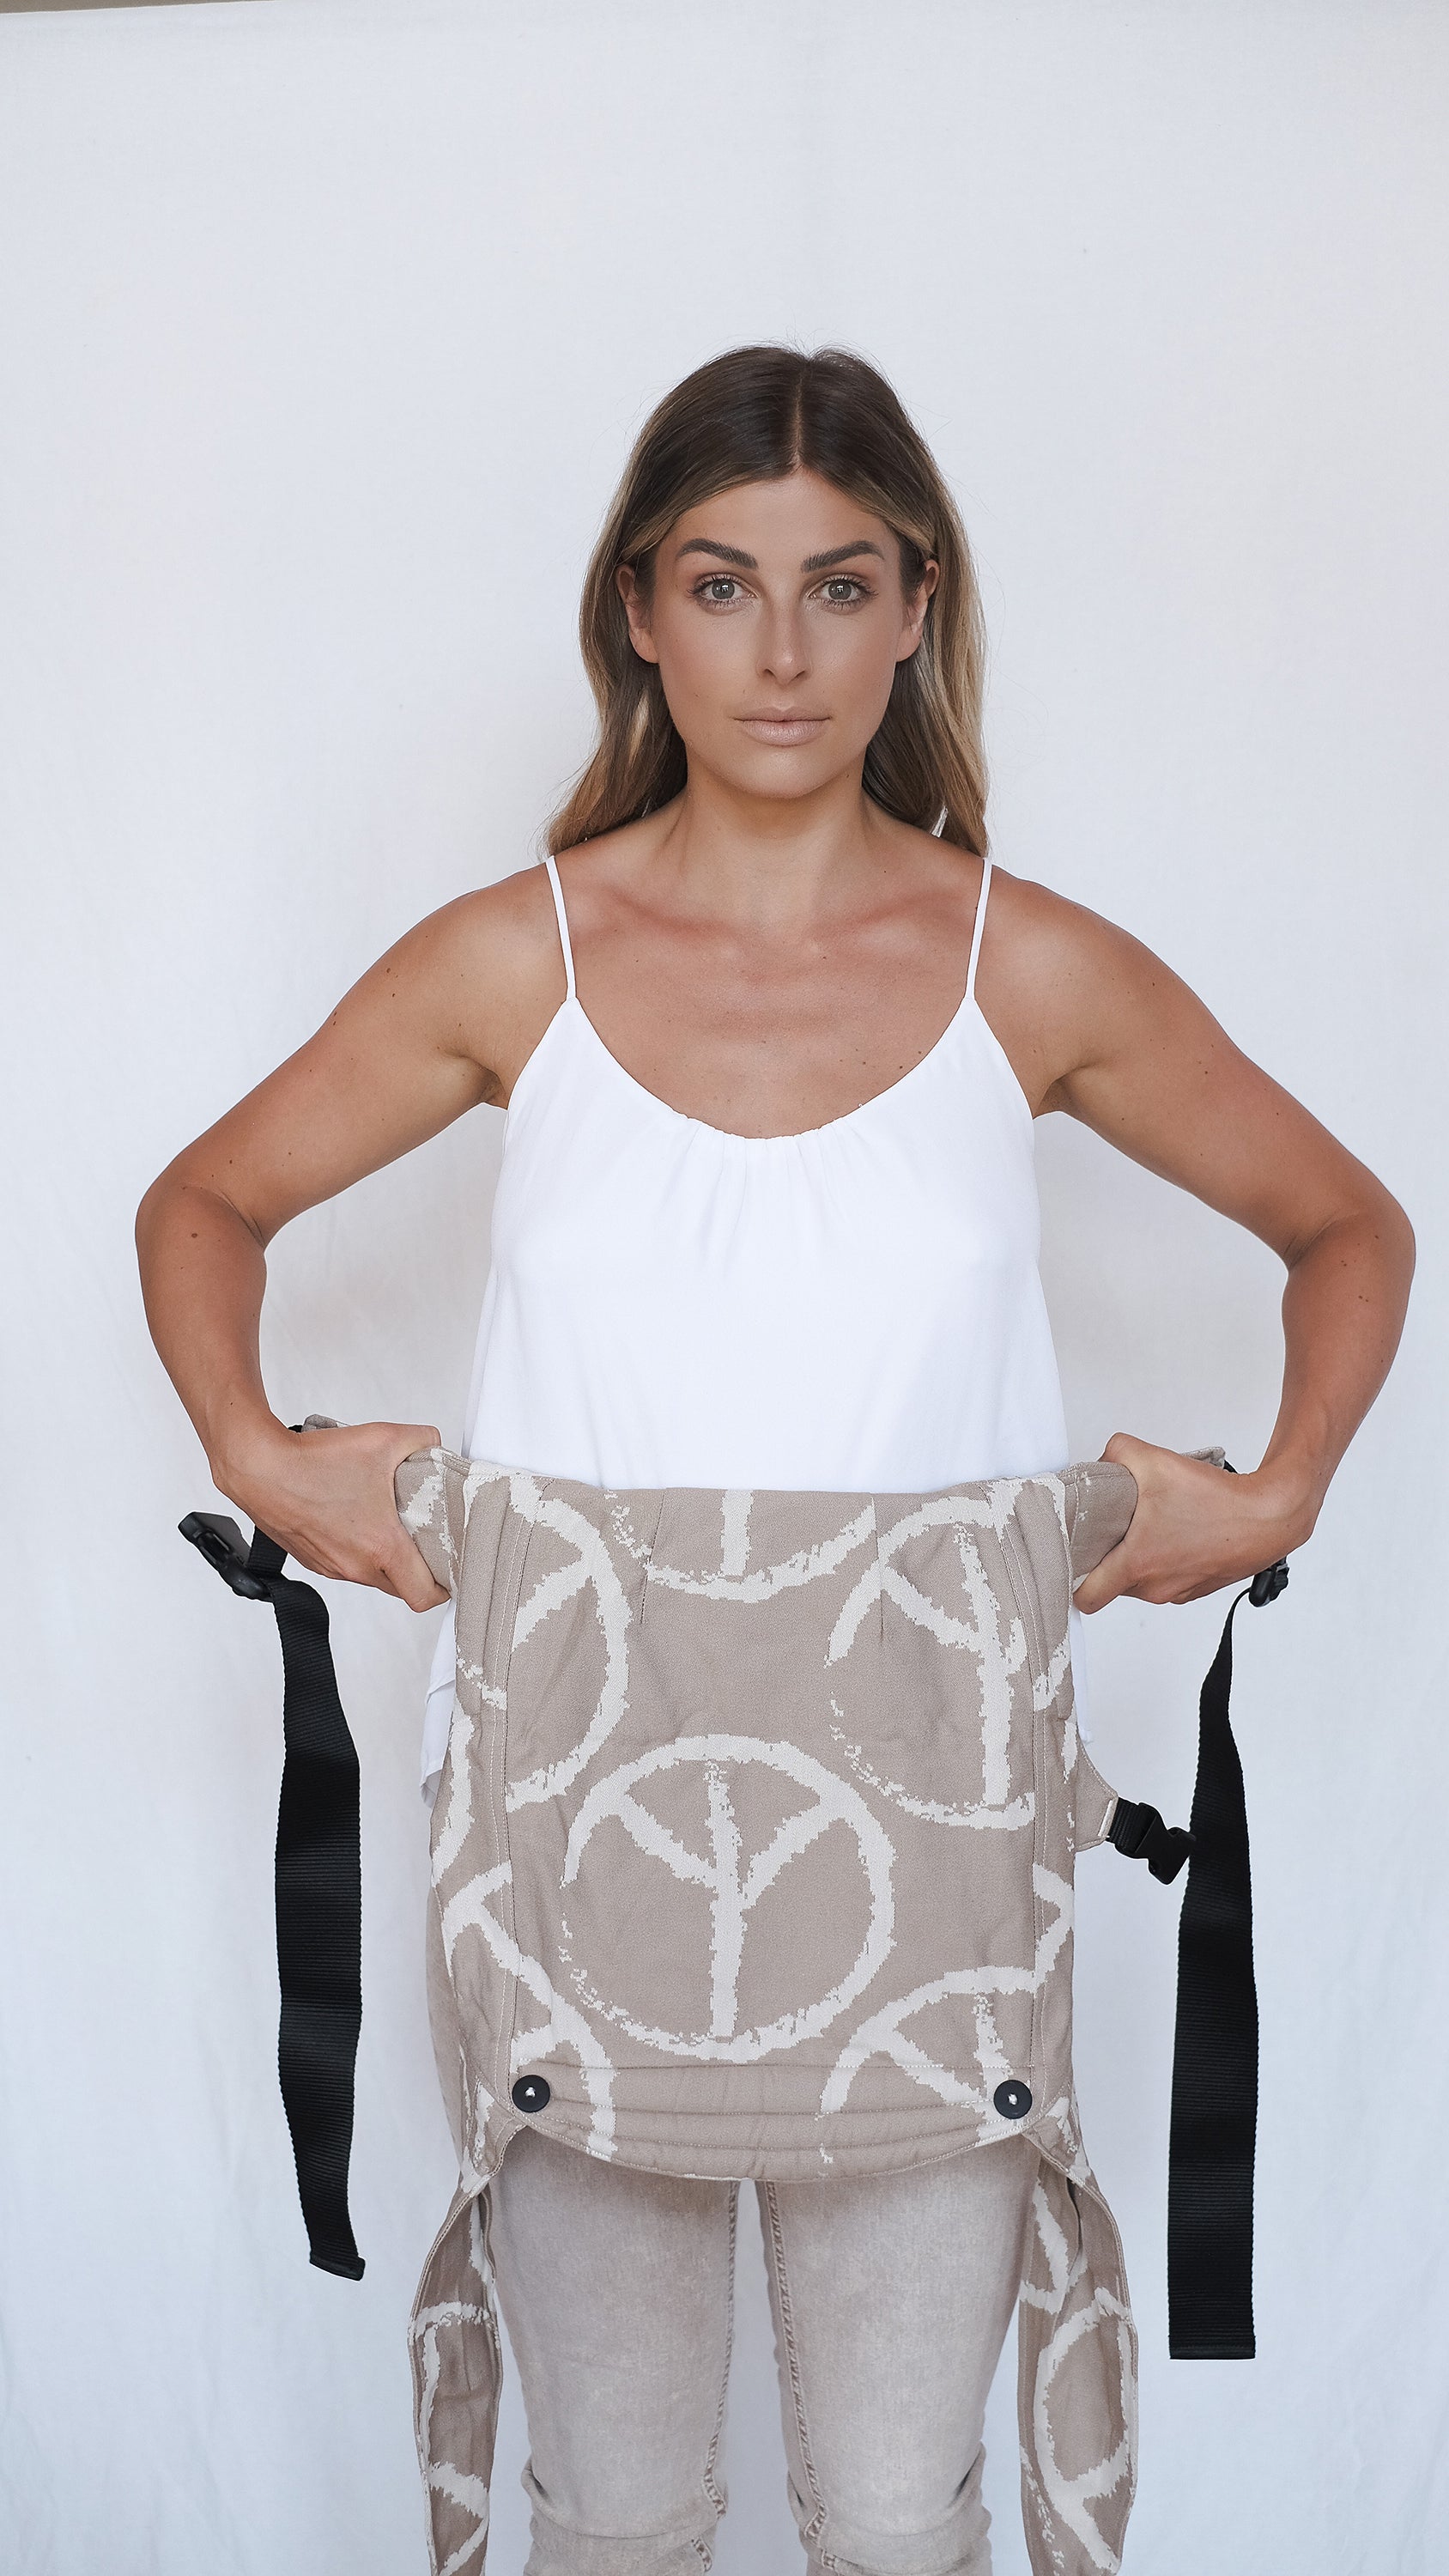
step 1
Hold the baby carrier facing you and overhead in front of you. Fold down the waist belt. Place hip belt at waist. Depending on the size of the child: further up or down.

step 2
Place hip belt at waist. Depending on the size of the child: further up or down. Close and tighten the buckle on the back.

step 3
Now push the baby carrier to the side.
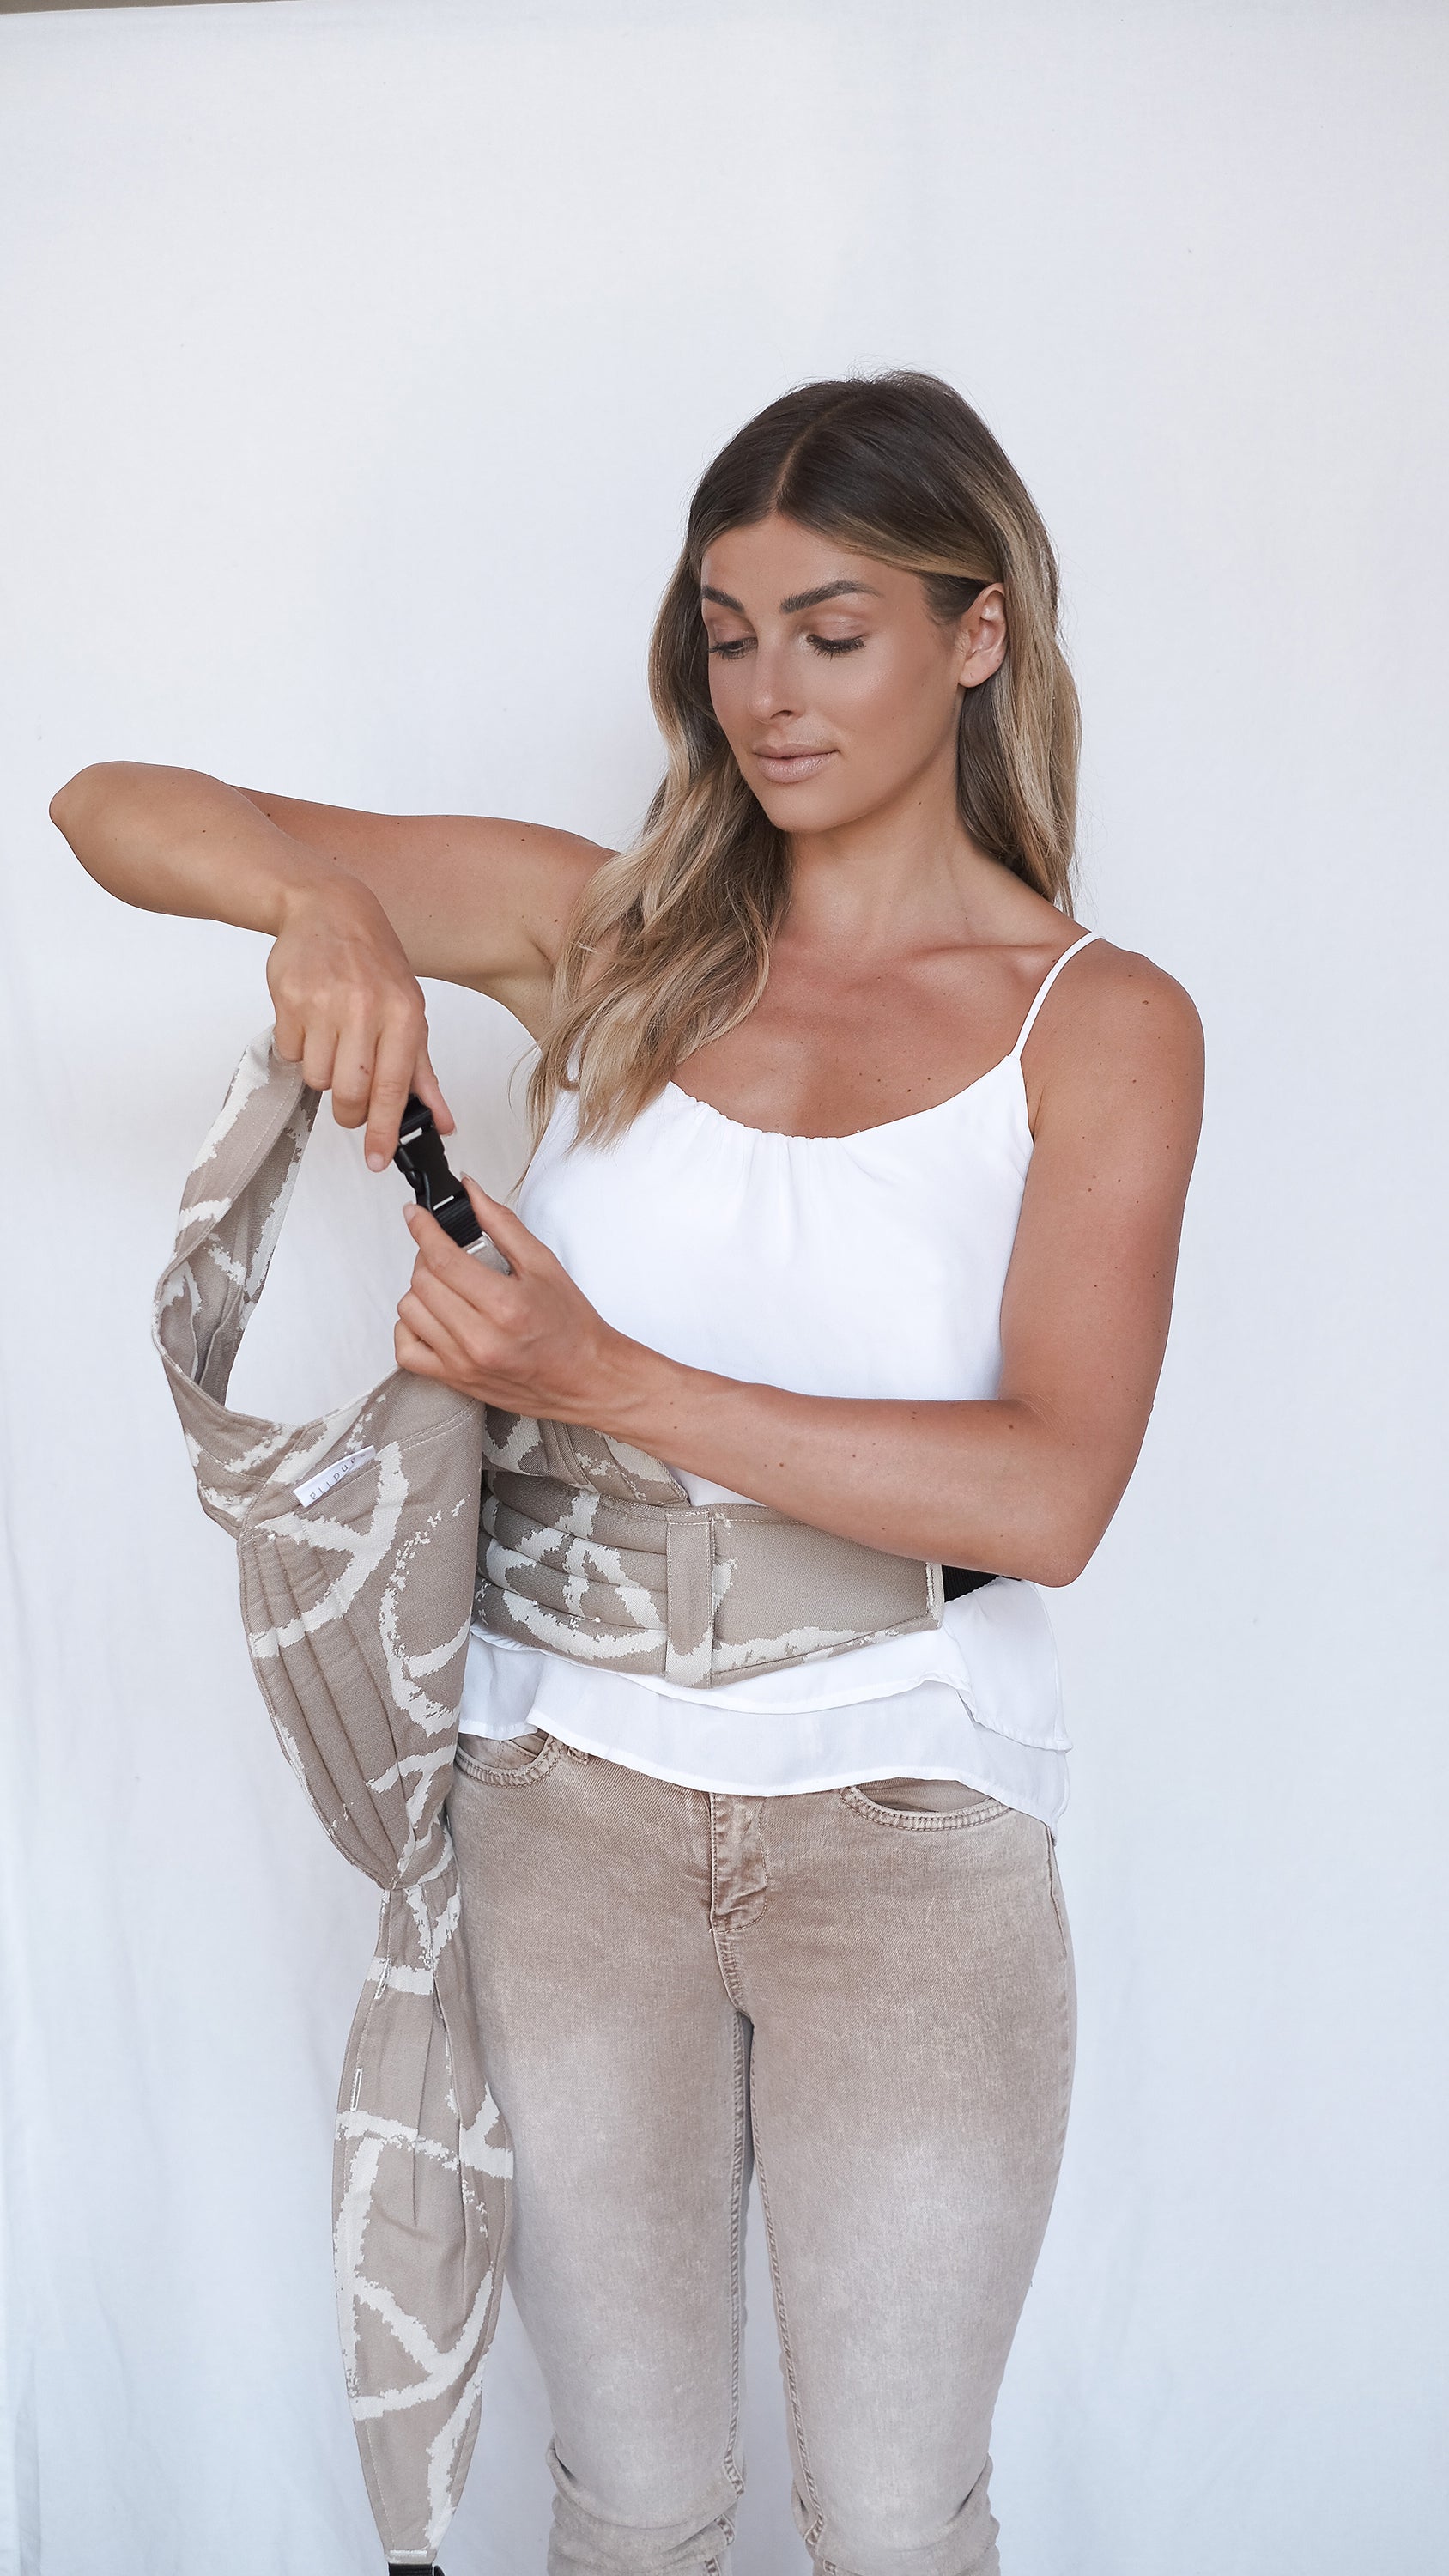
step 4
Prepare the shoulder straps and fasten the buckles. (Not crosswise, but like a backpack).
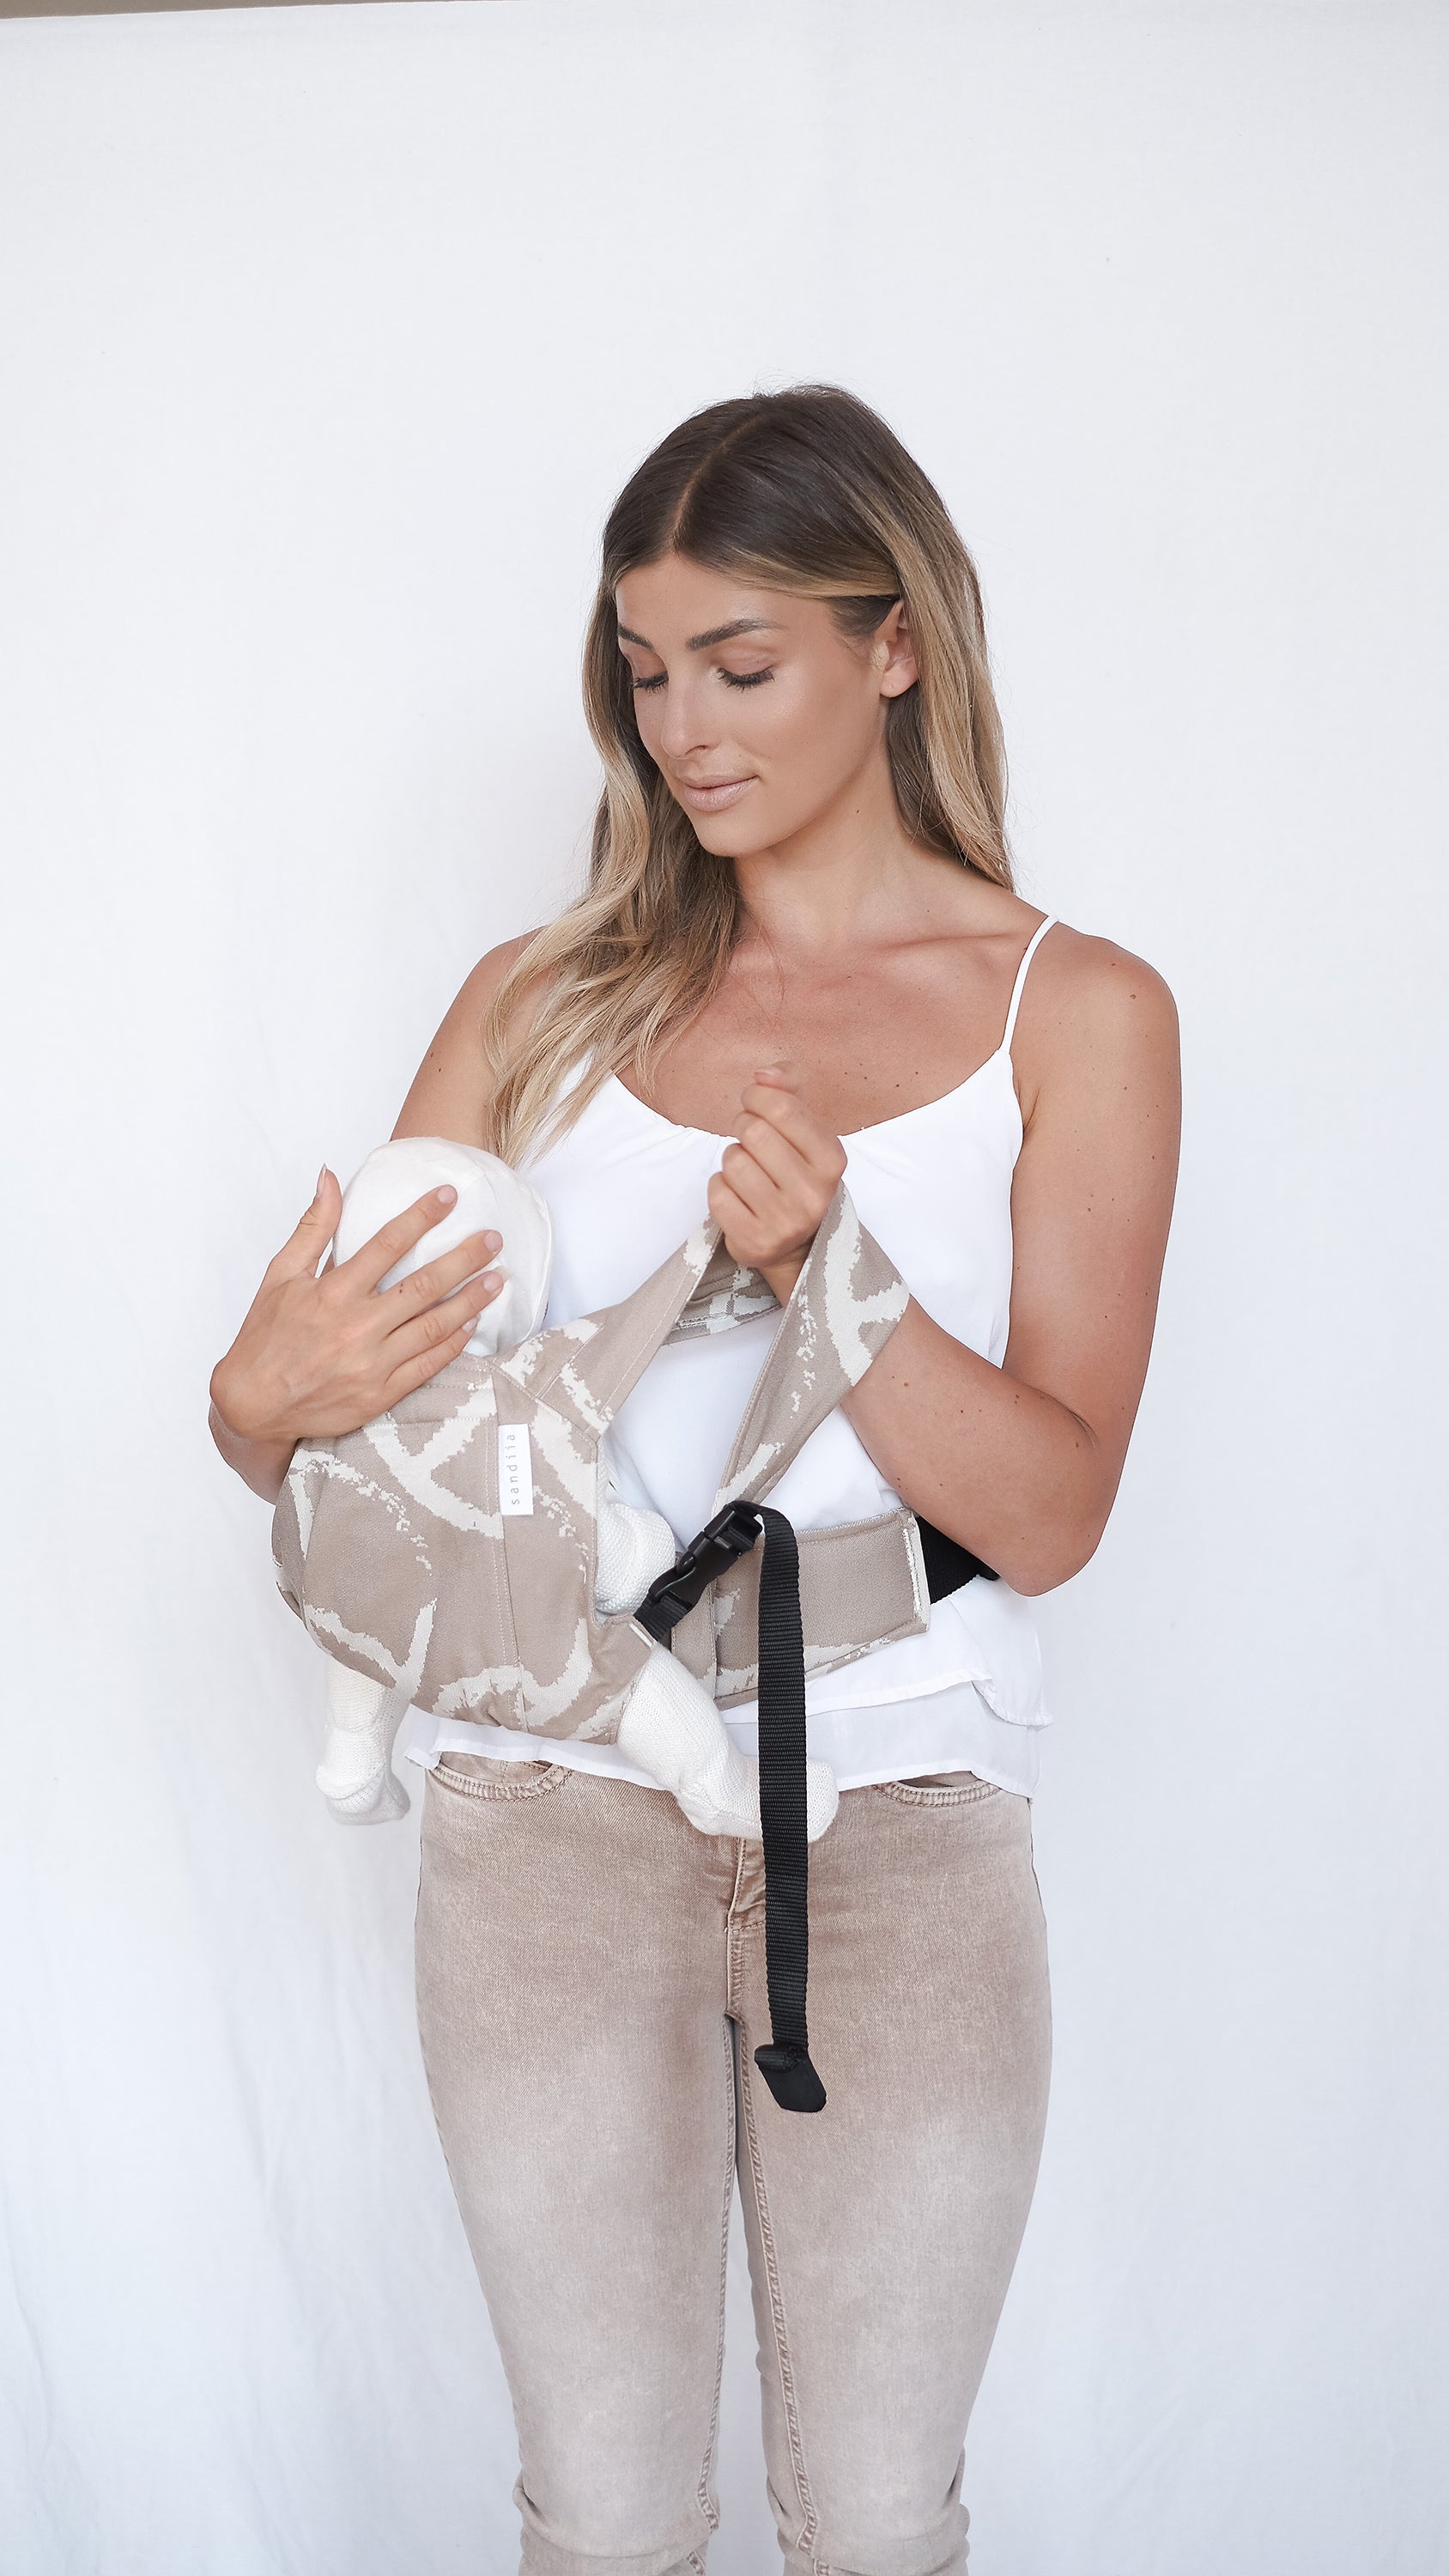
step 5
Now put your baby in the carrier with the belly to you. Hold the child with one hand and grab both straps with the other.
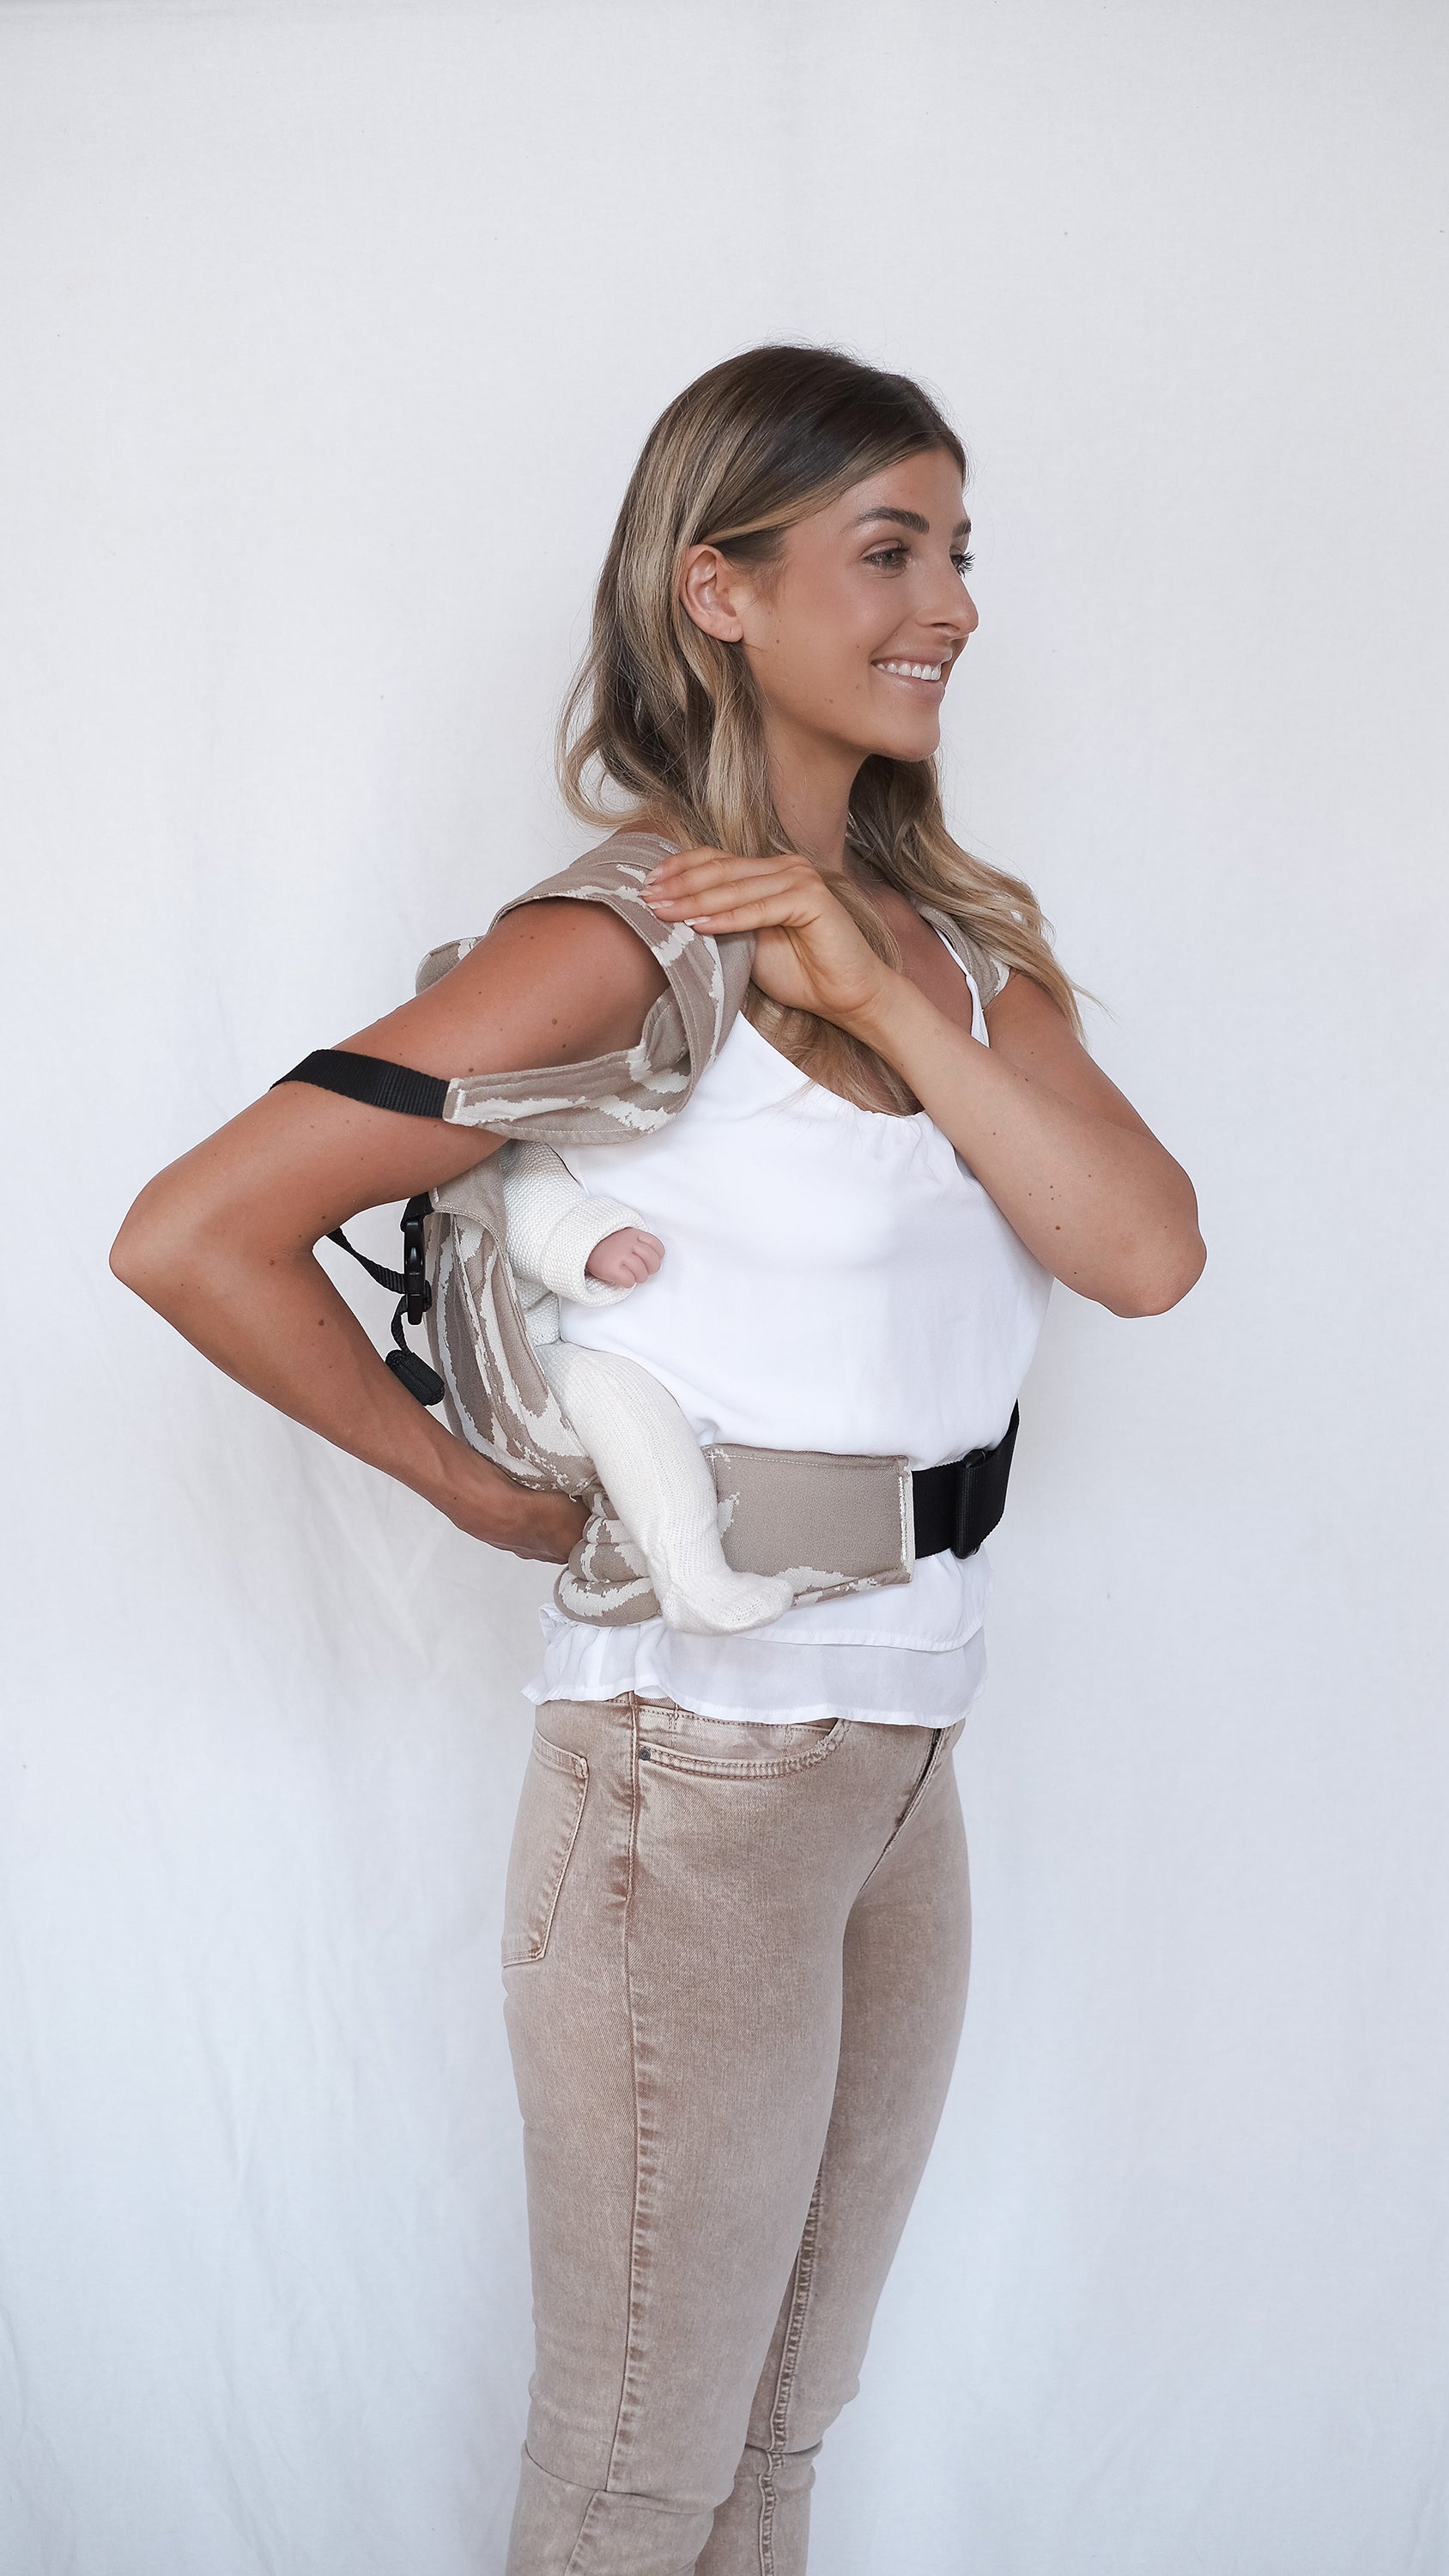
step 6
Now carefully slide the carrier onto your back.
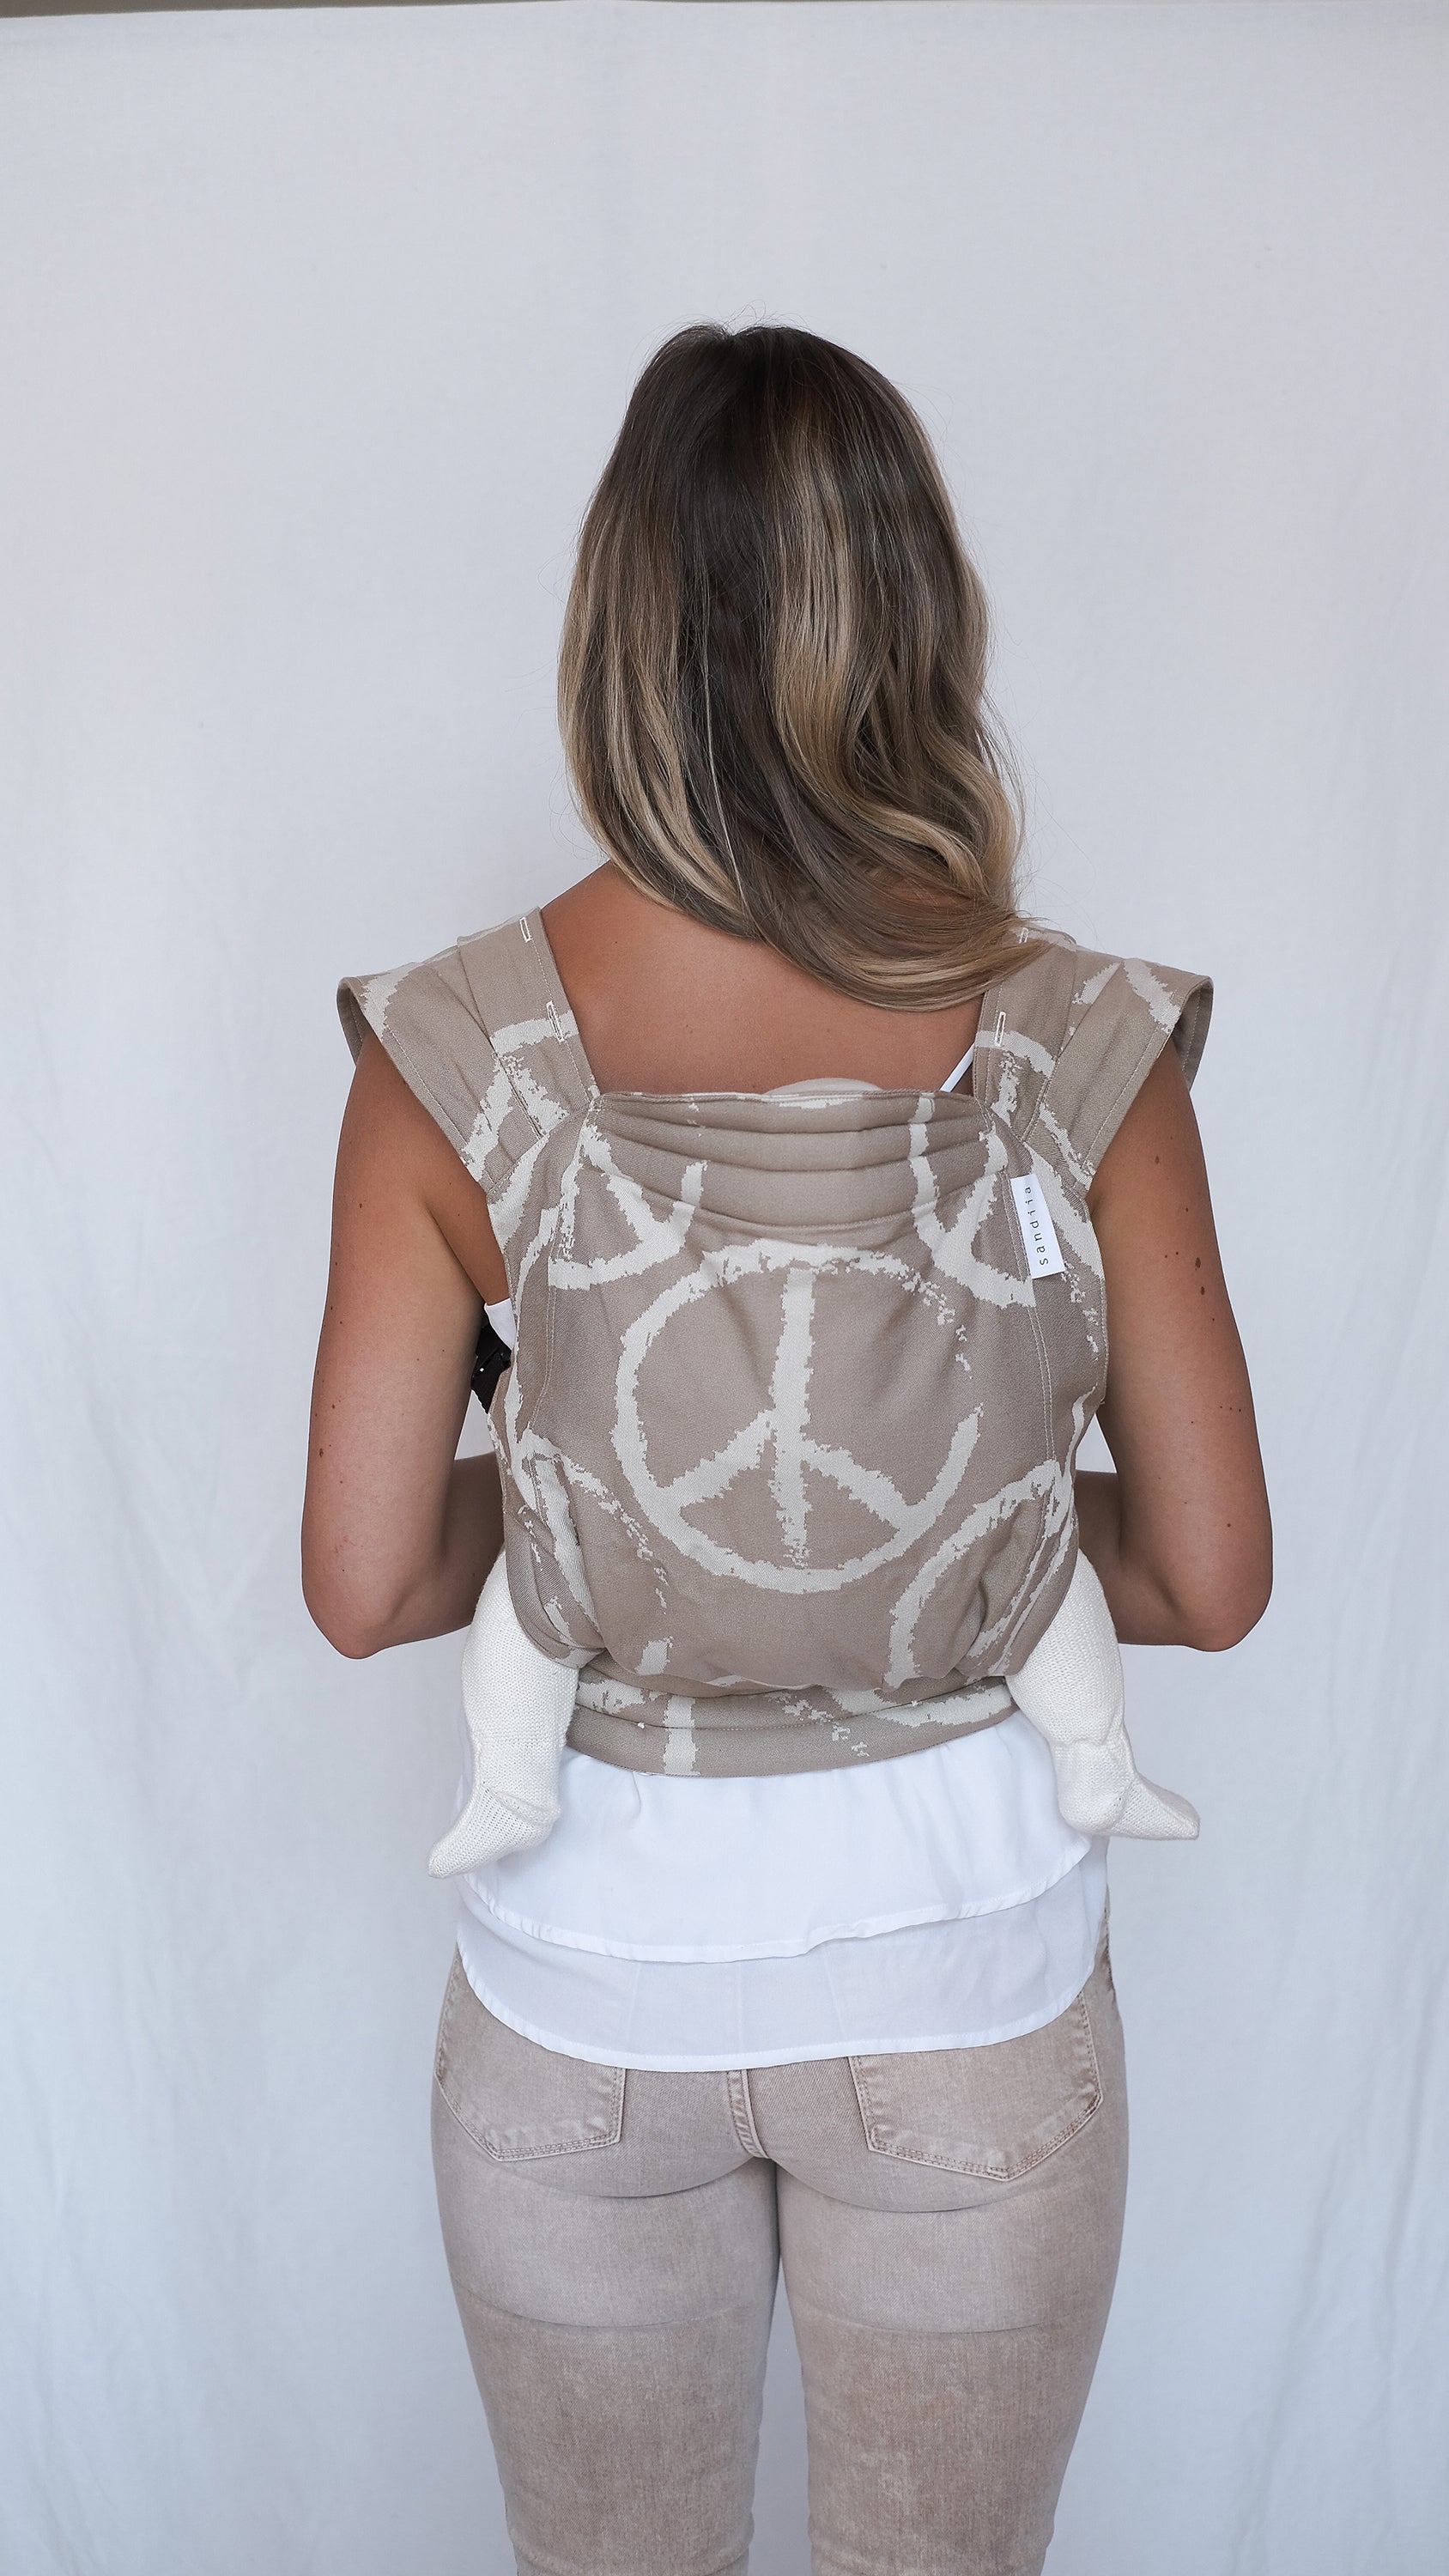
step 7
Now slip into the shoulder straps, like a backpack. Tighten the straps. Be careful not to pinch any part of your baby's body.

step 8
Take the enclosed bridge and connect the shoulder straps together. This is to prevent the shoulder straps from slipping over your shoulders.
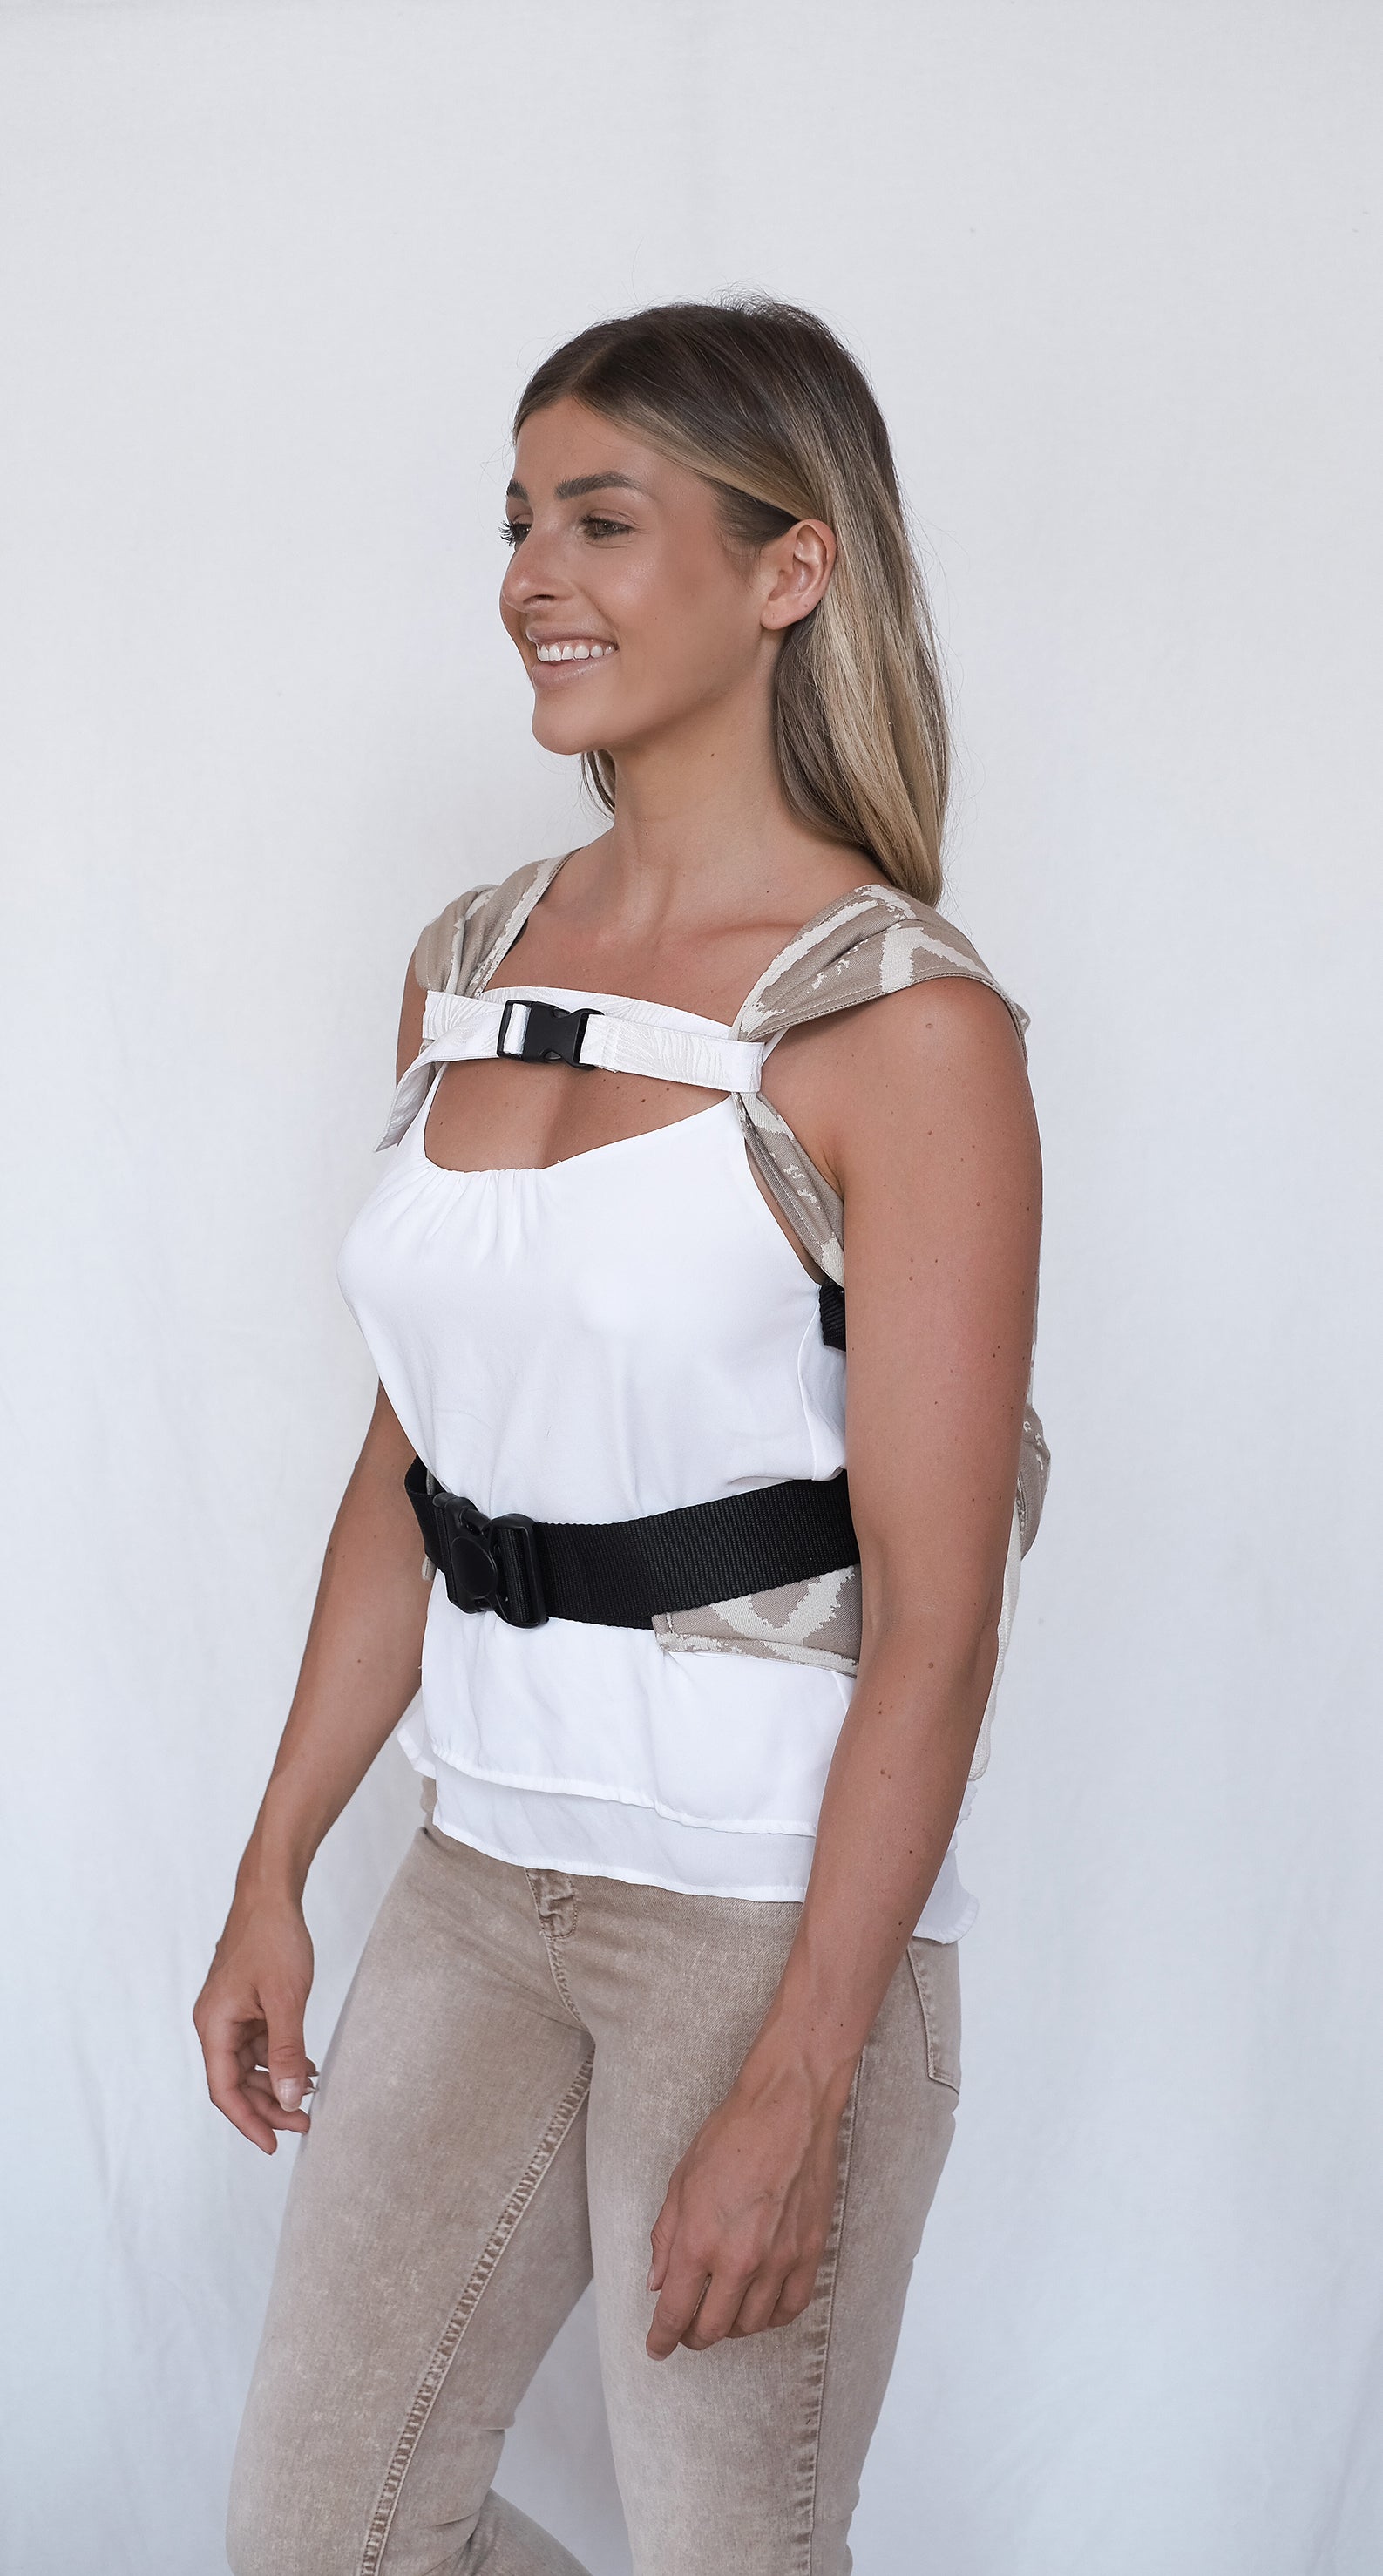
step 9
Complete! Ready to go!
Back carrier toddlers
It's that easy!
Muriel shows you how to put your child in the back carrier. Please note that we only recommend back carrying once babies can hold their heads up on their own.
